PRAAT
Table of Contents
Installing Praat
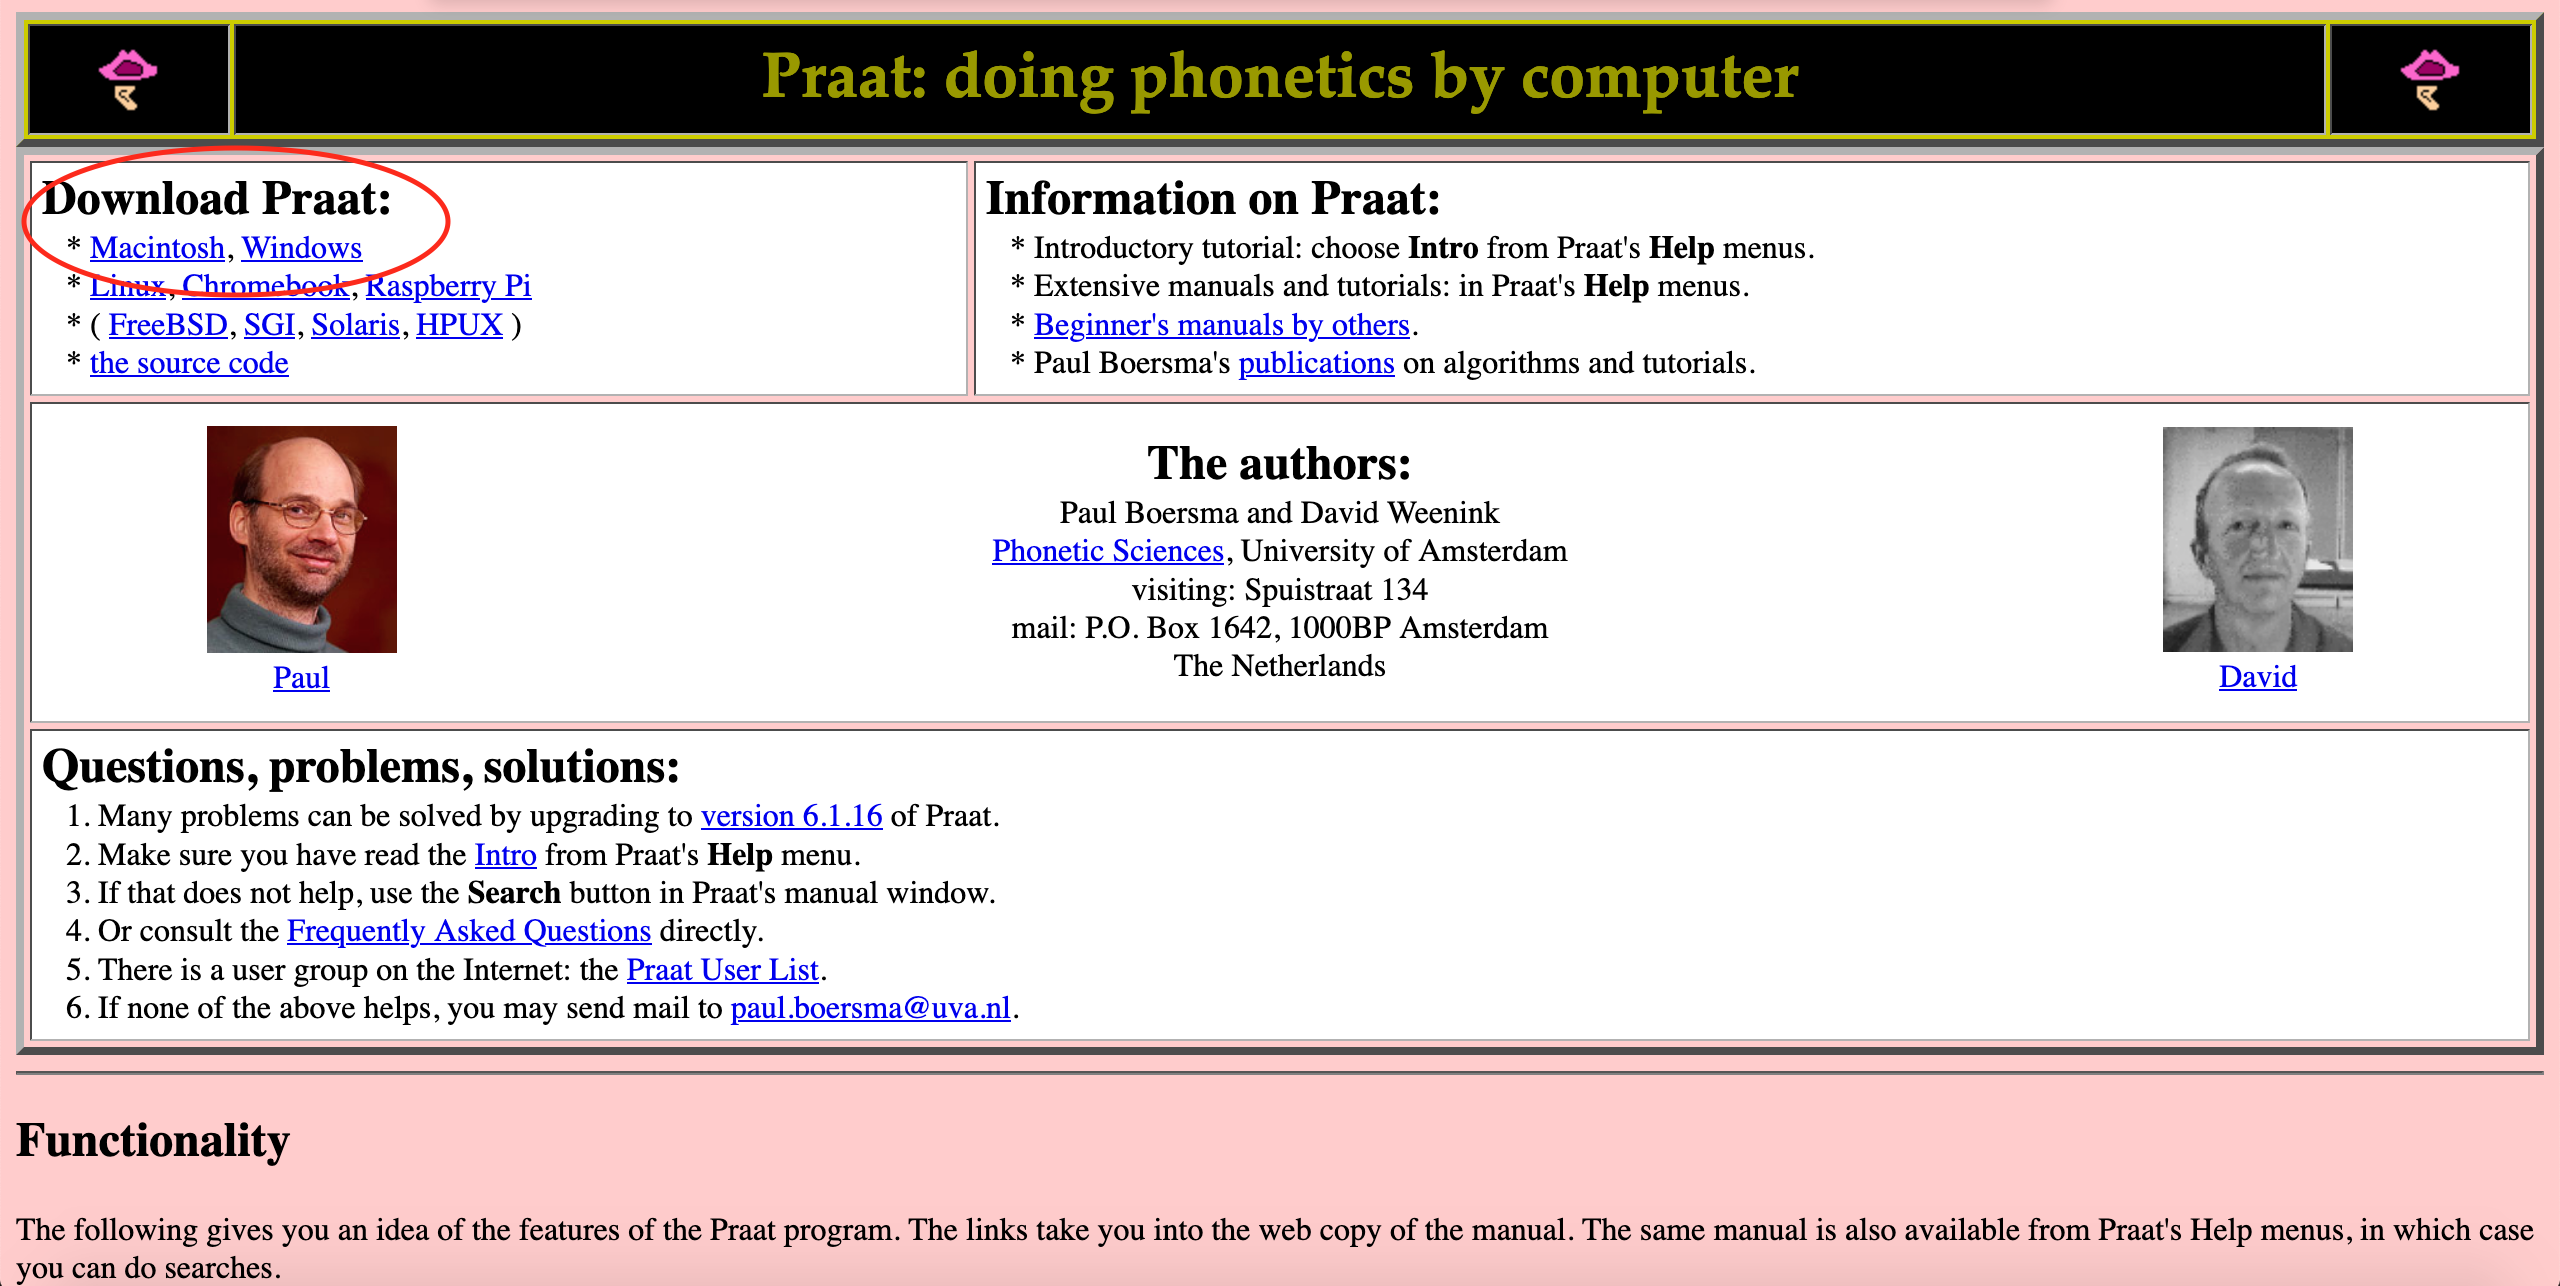
Go to http://fonsg3.hum.uva.nl/praat/ and click either “Macintosh” or “Windows” under “Download Praat”, depending on your OS.
- Follow the instructions listed in the website to install Praat on your computer.
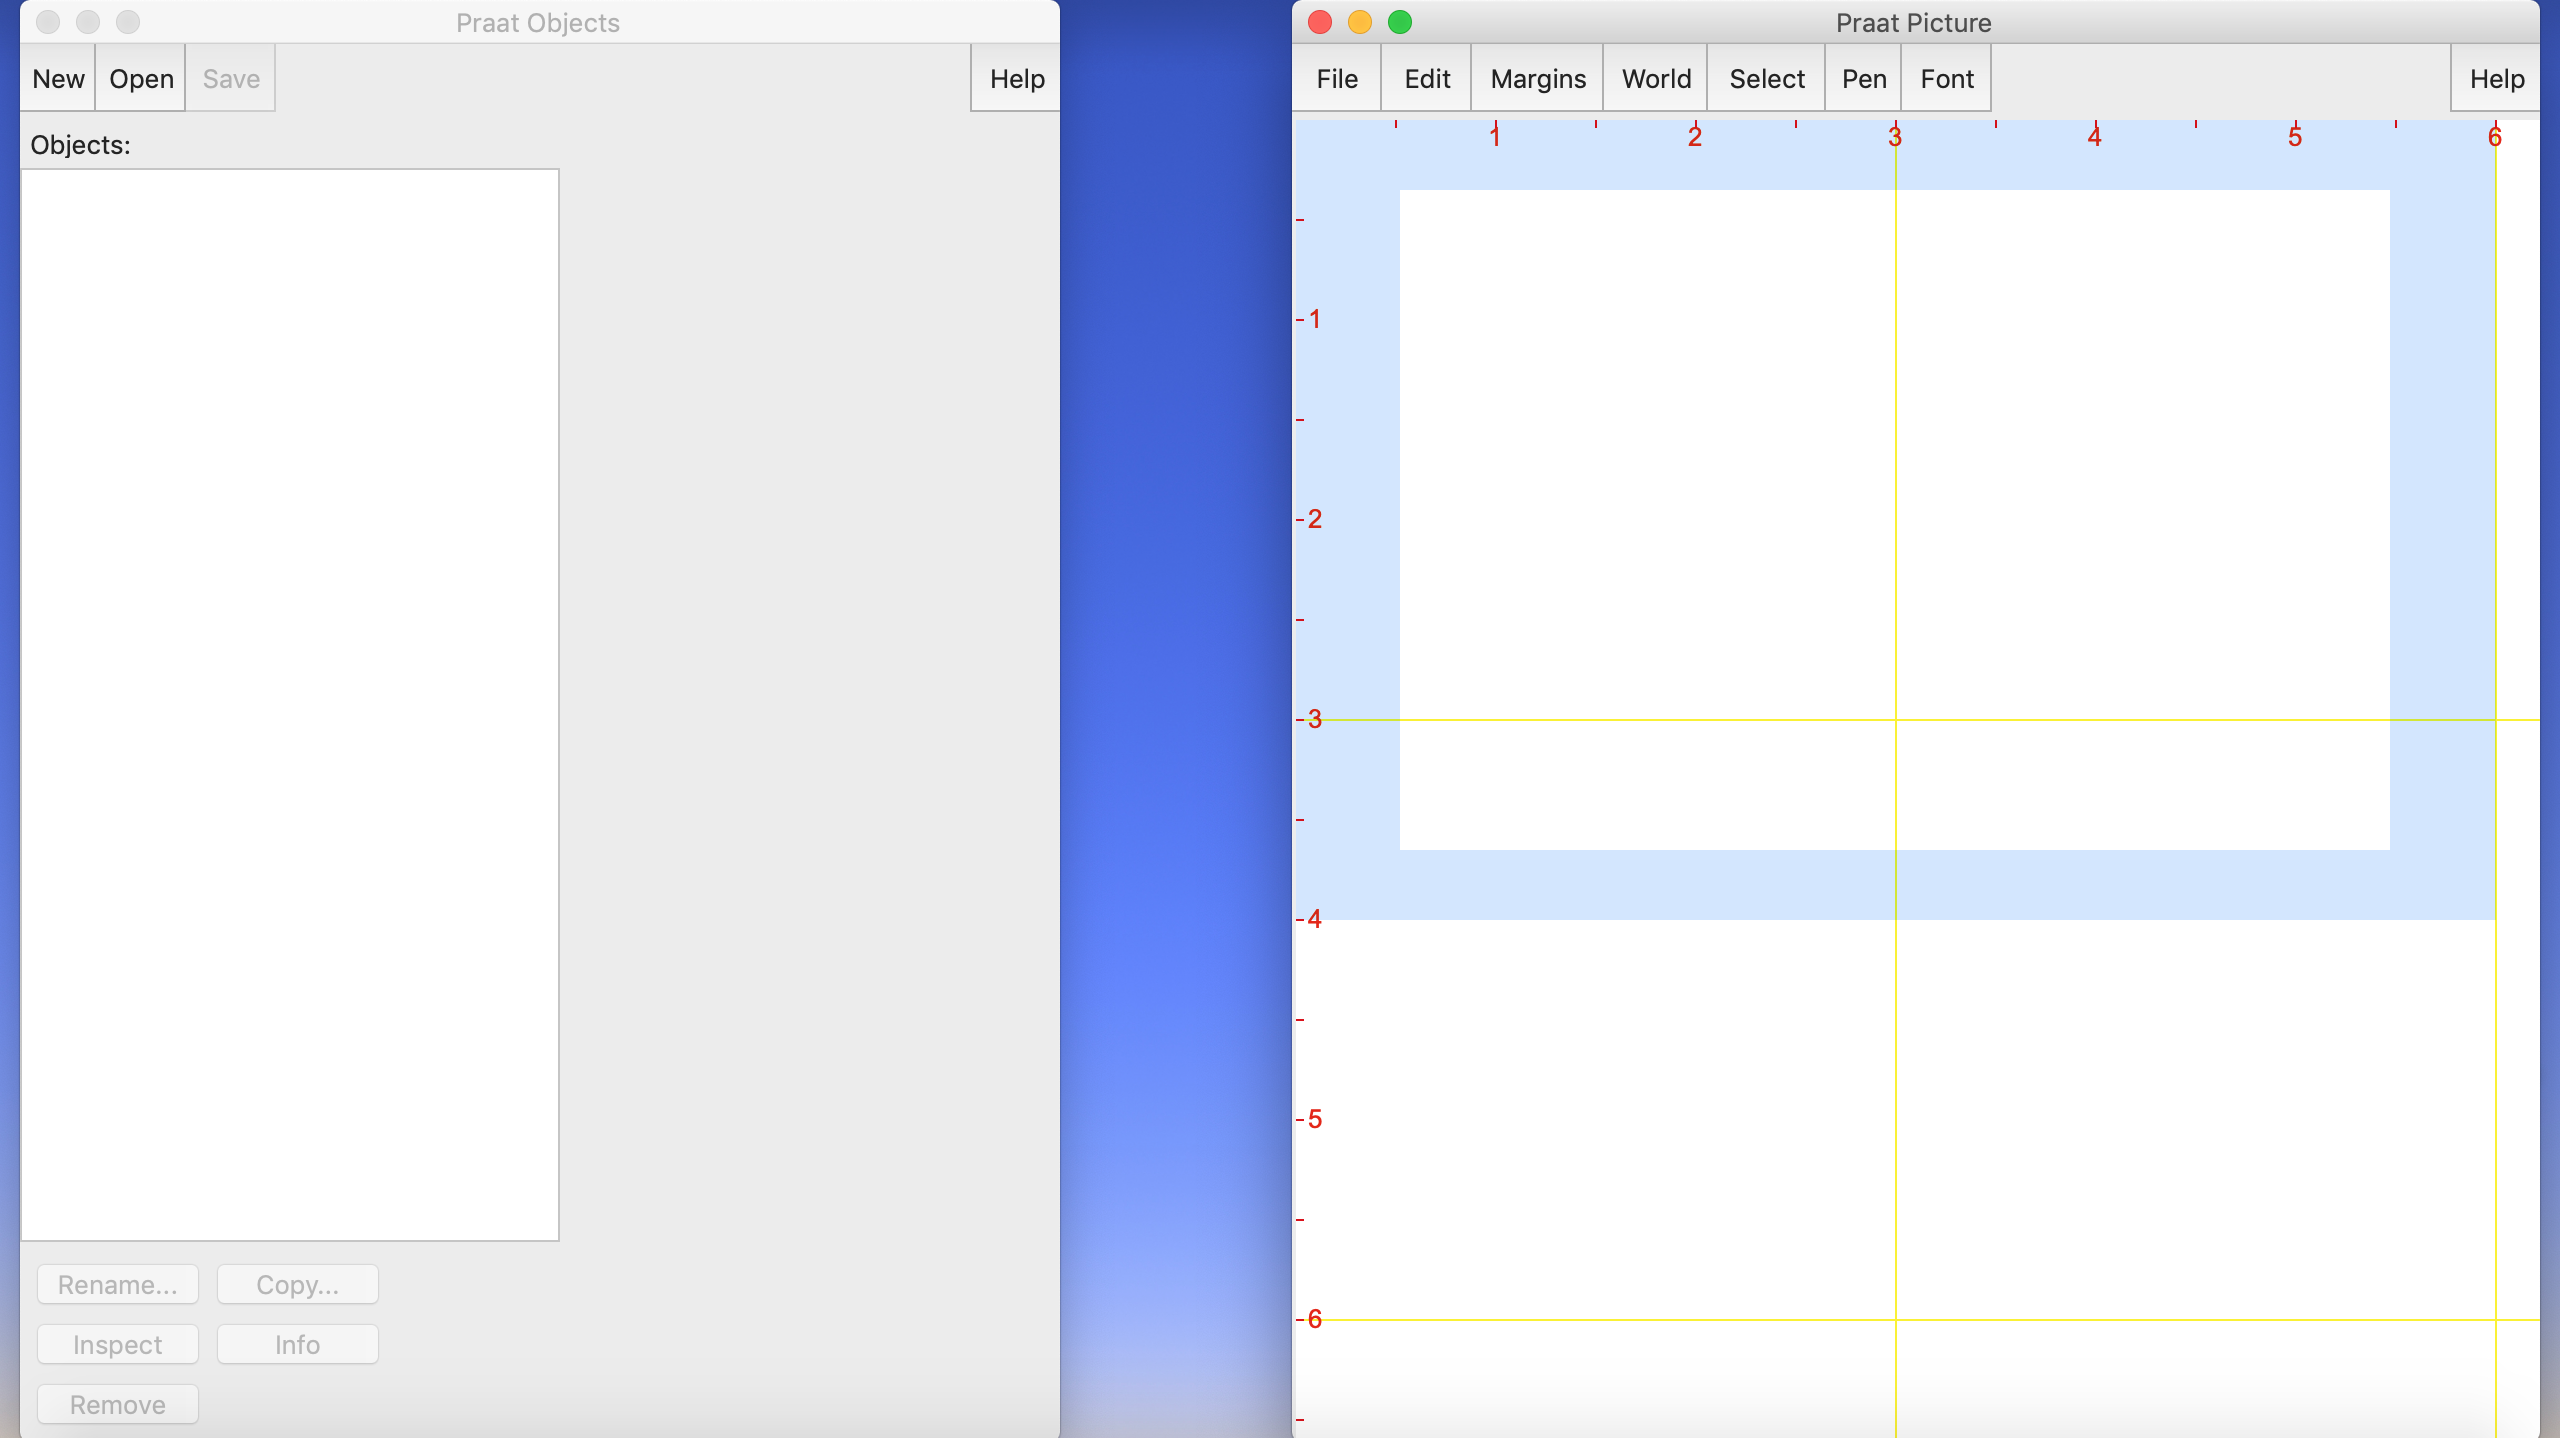
Open Praat and you will see something like this:
Recording a new audio with PRAAT
- First, make sure you have a microphone connected to your computer. You can use a professional microphone, but if you do not have one of those, you can use your headphones’s microphone instead. Avoid recording with the computer’s built-in microphone, unless you are sure it is a very good one.
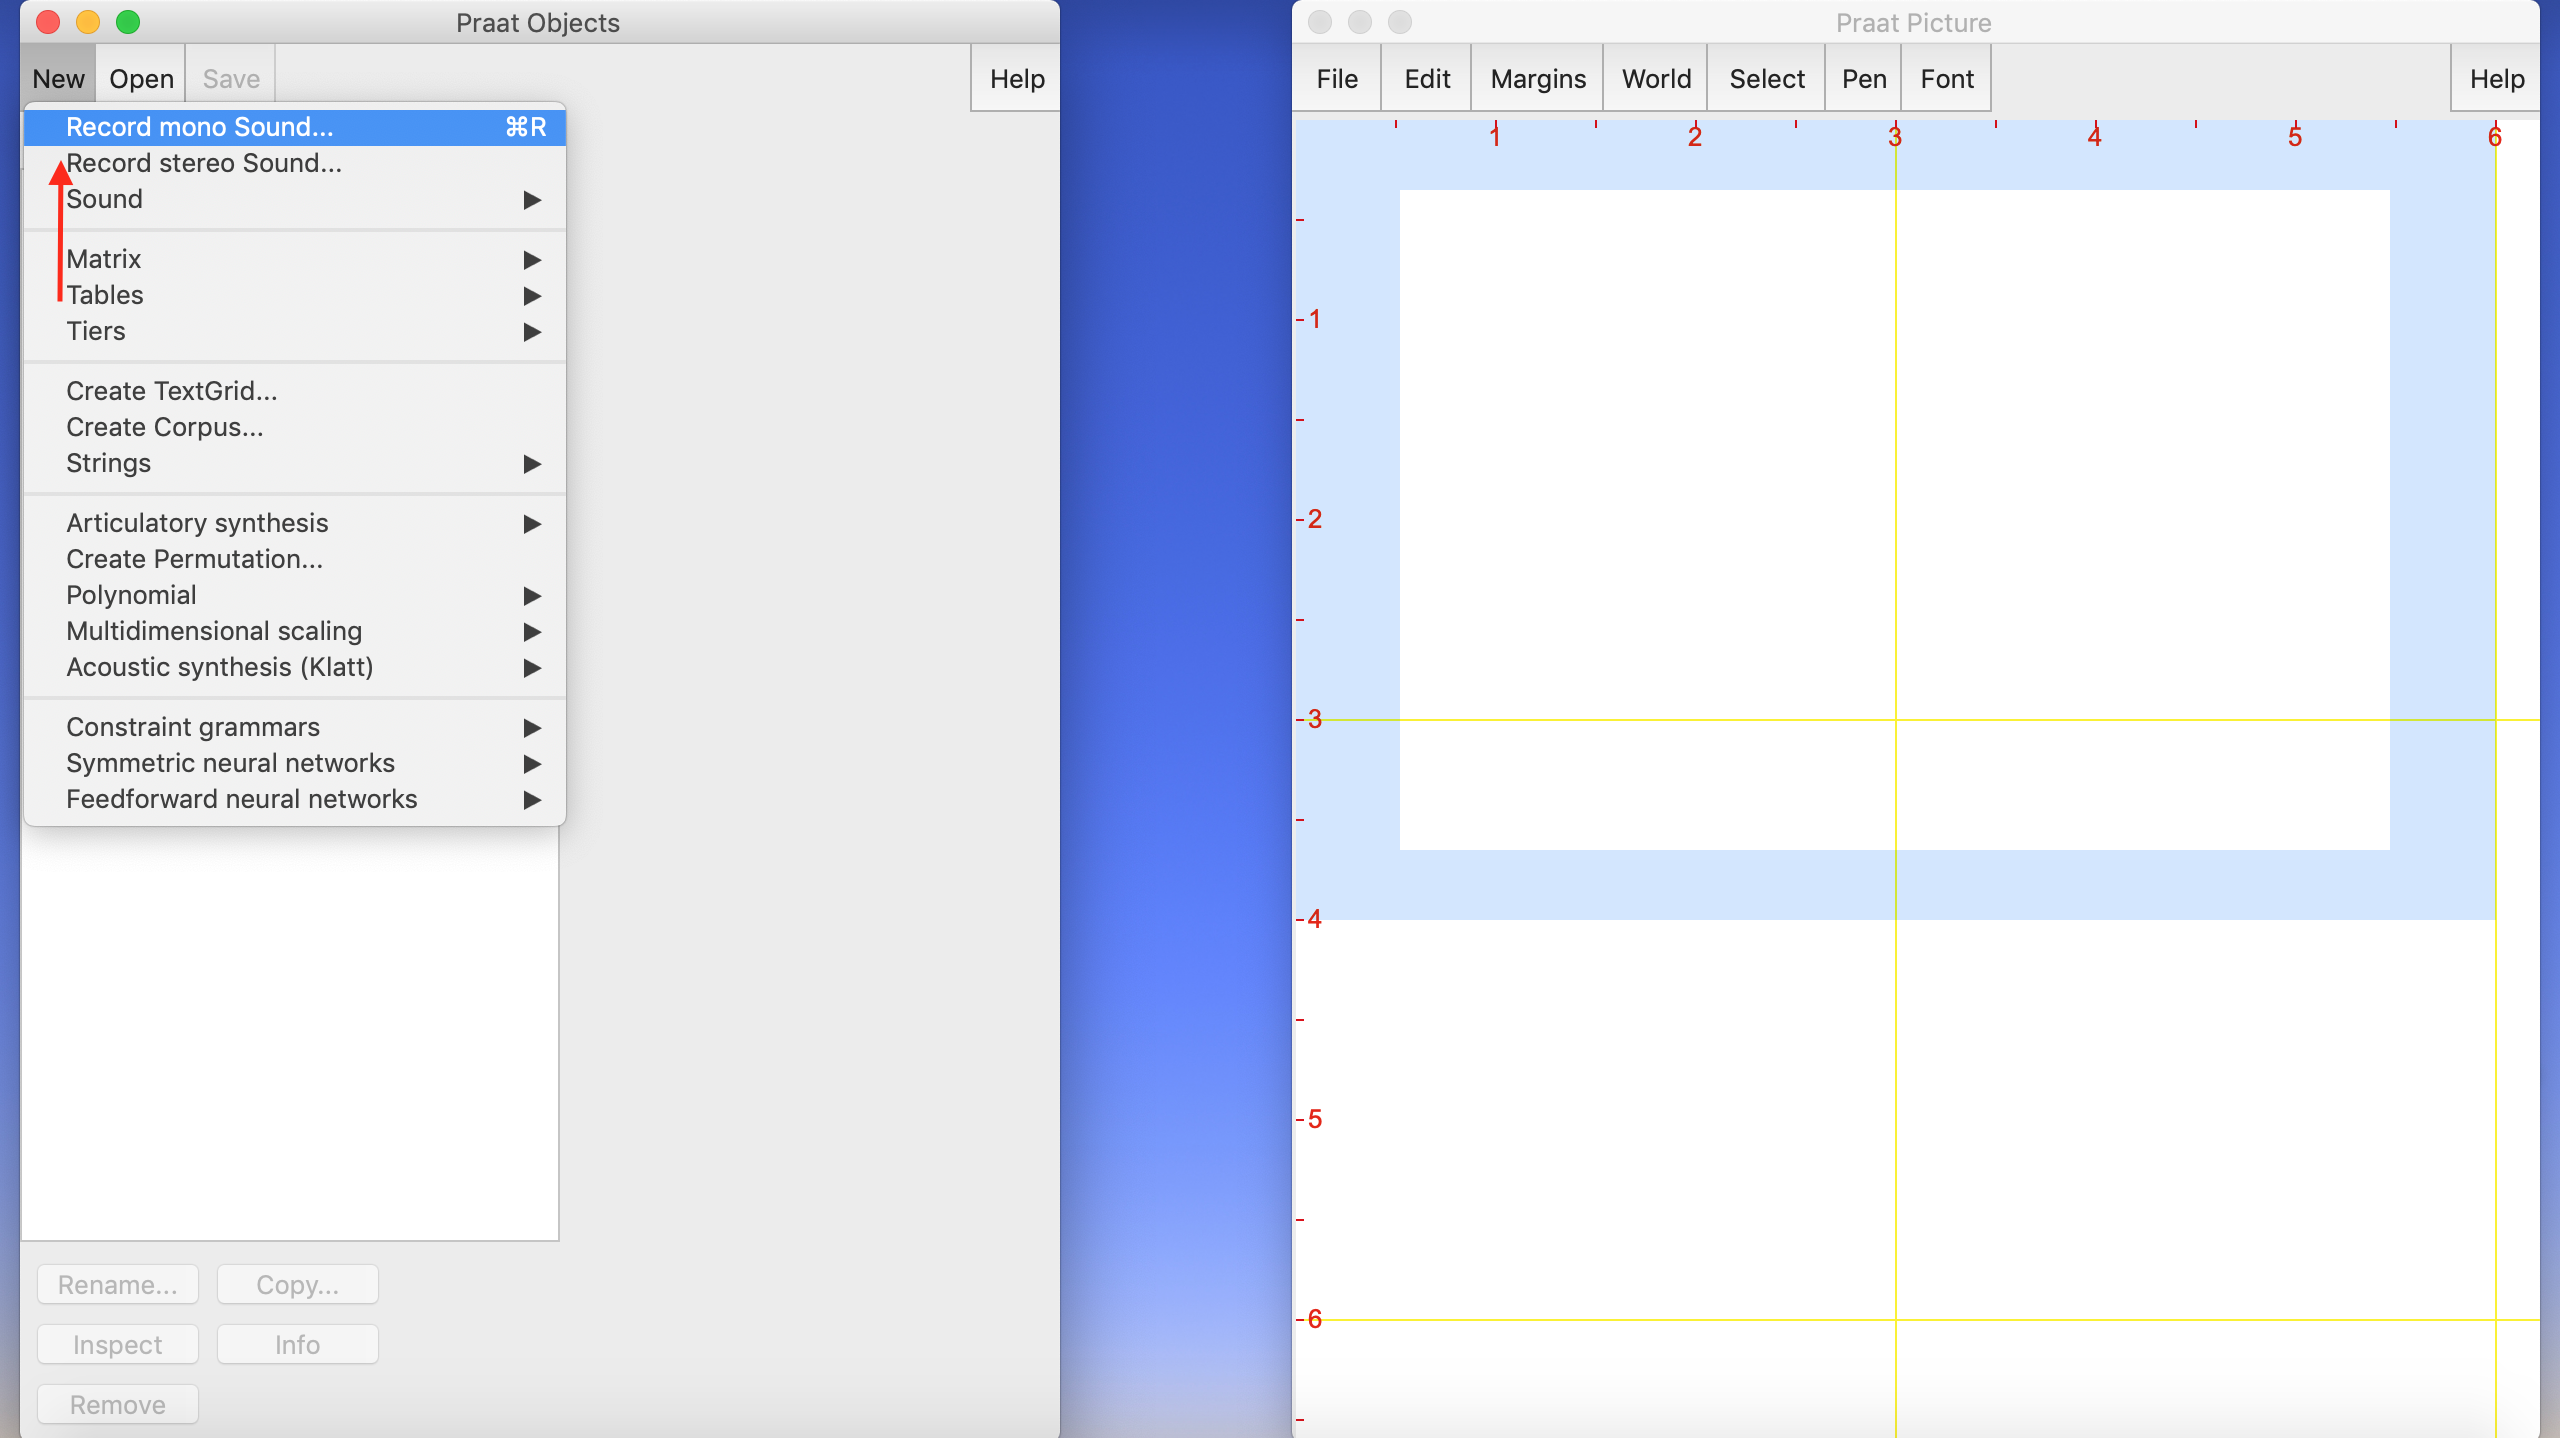
To record a new audio with Praat, go to “New” > “Record mono sound”.
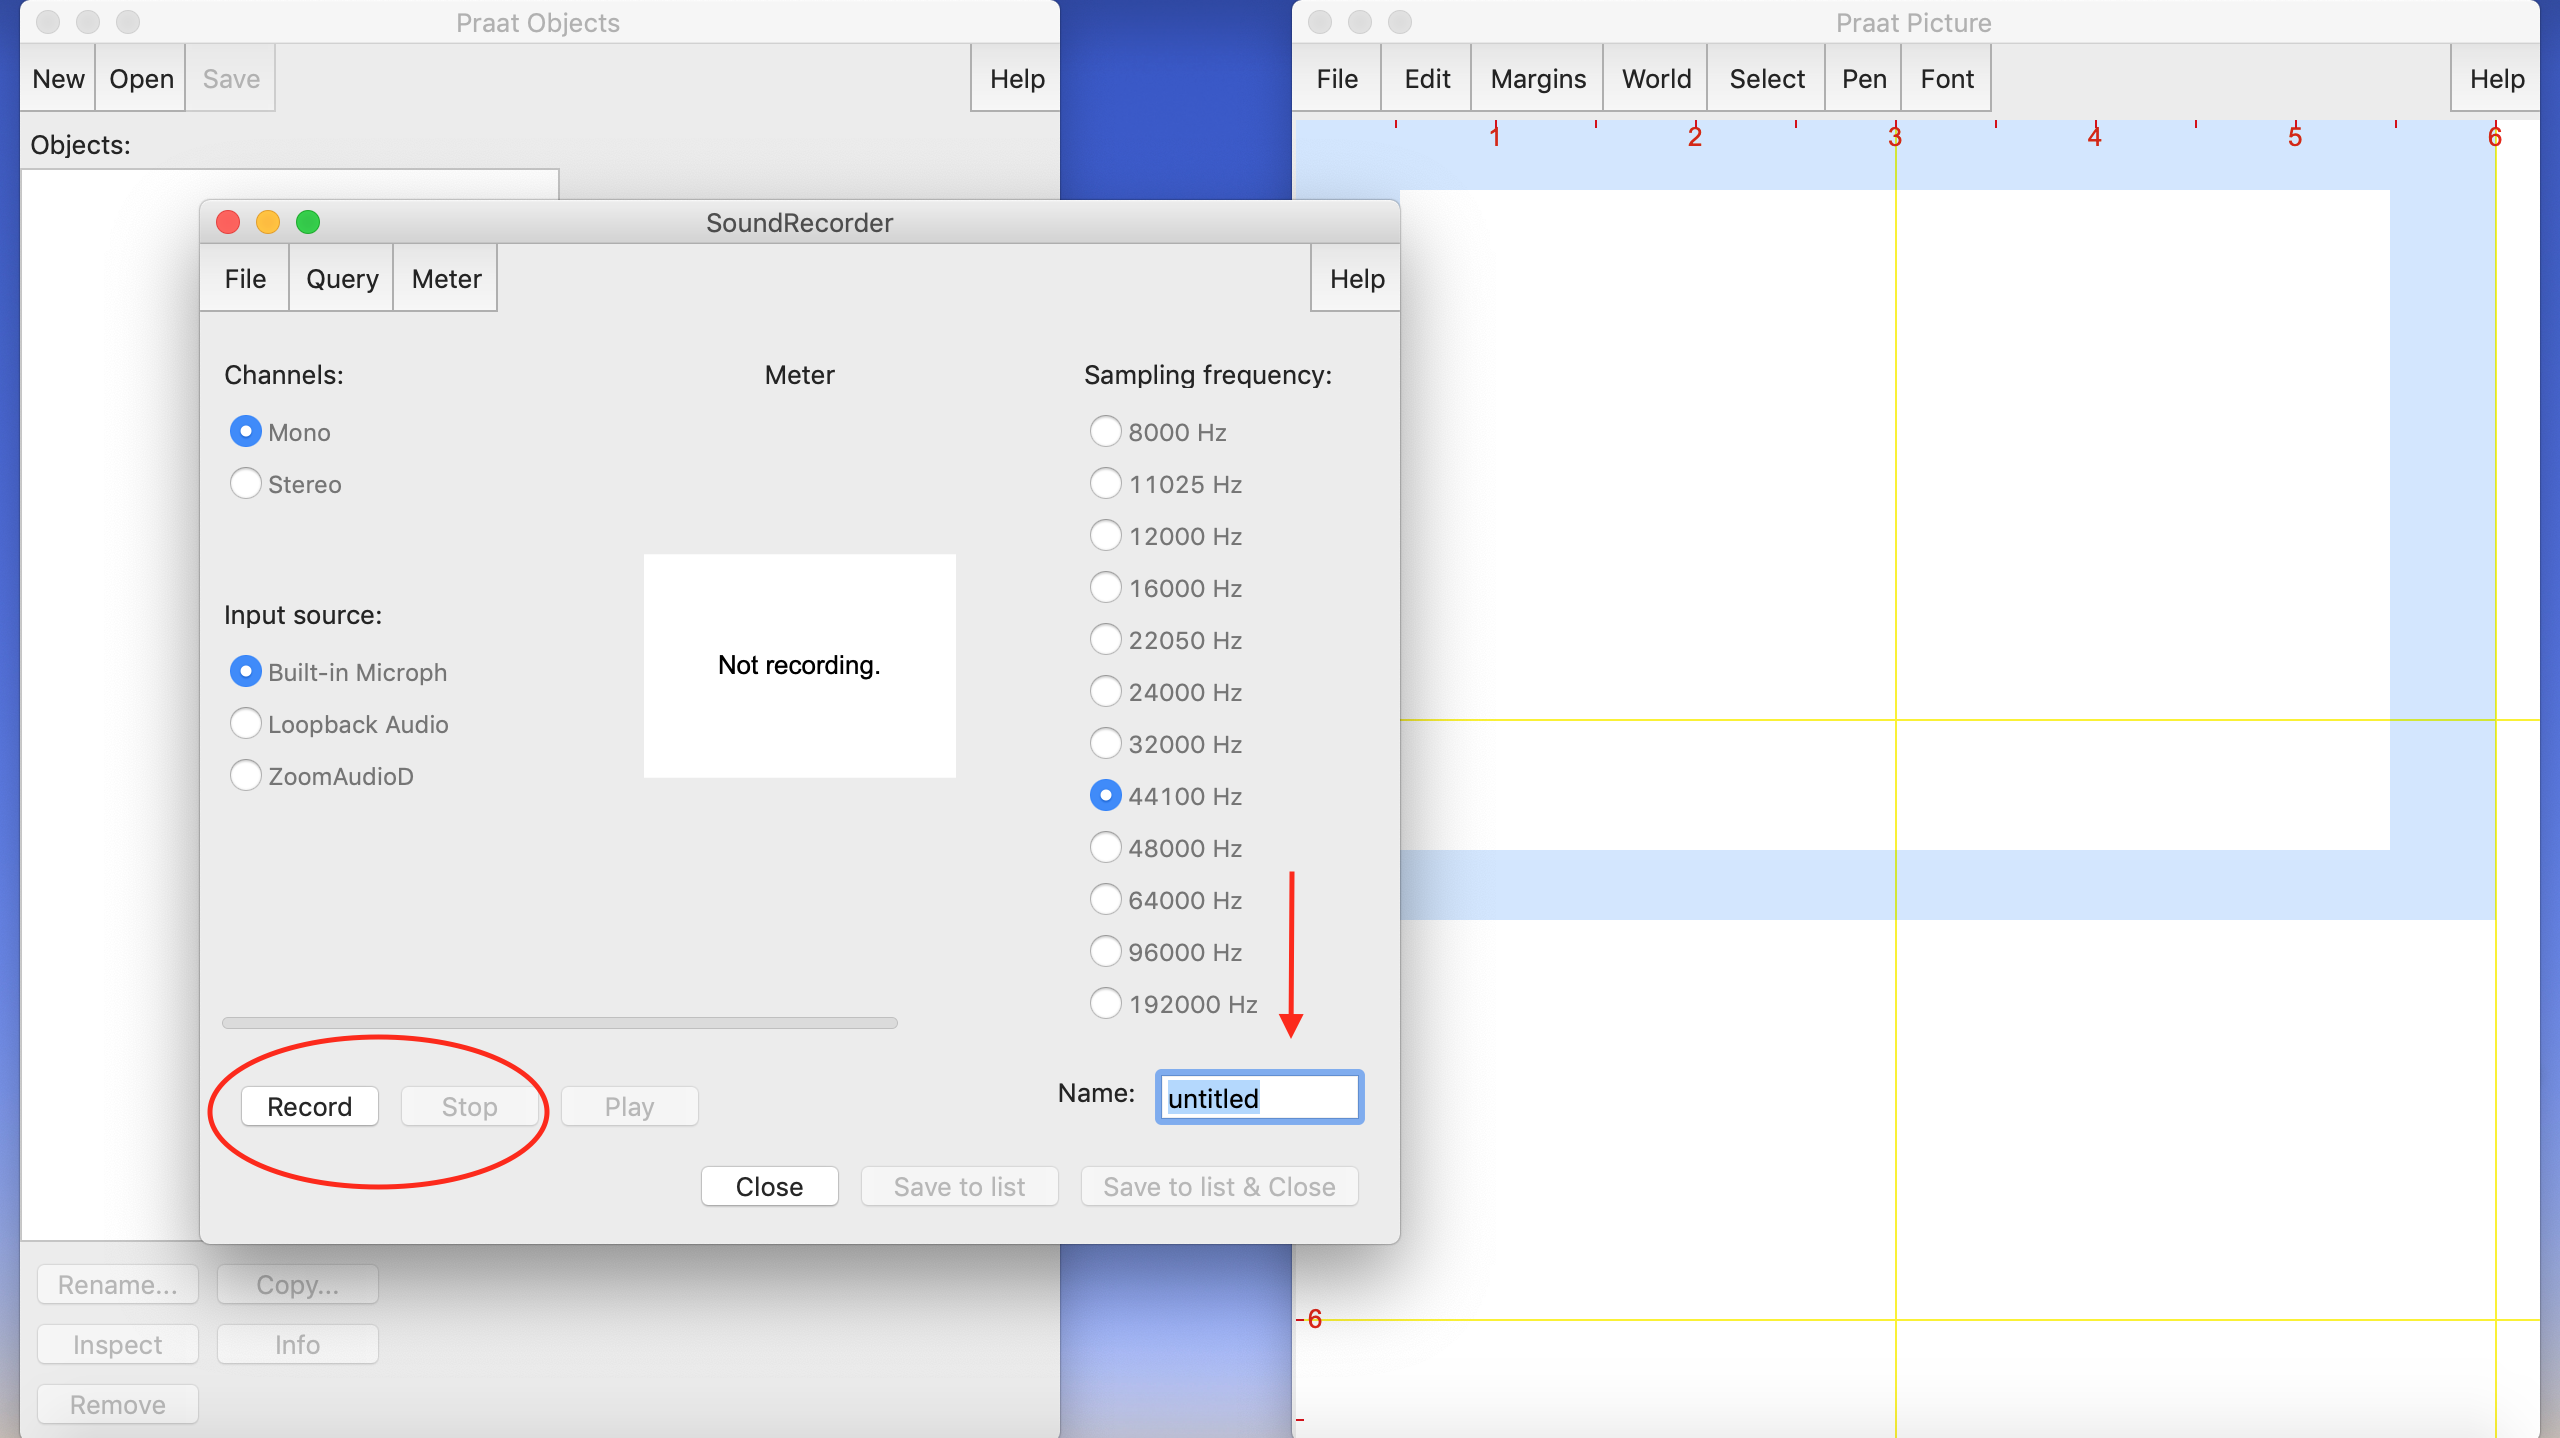
A new window will pop up. Leave the default settings, and give the file a name. Then, click “Record” to start recording and “Stop” when you finish.
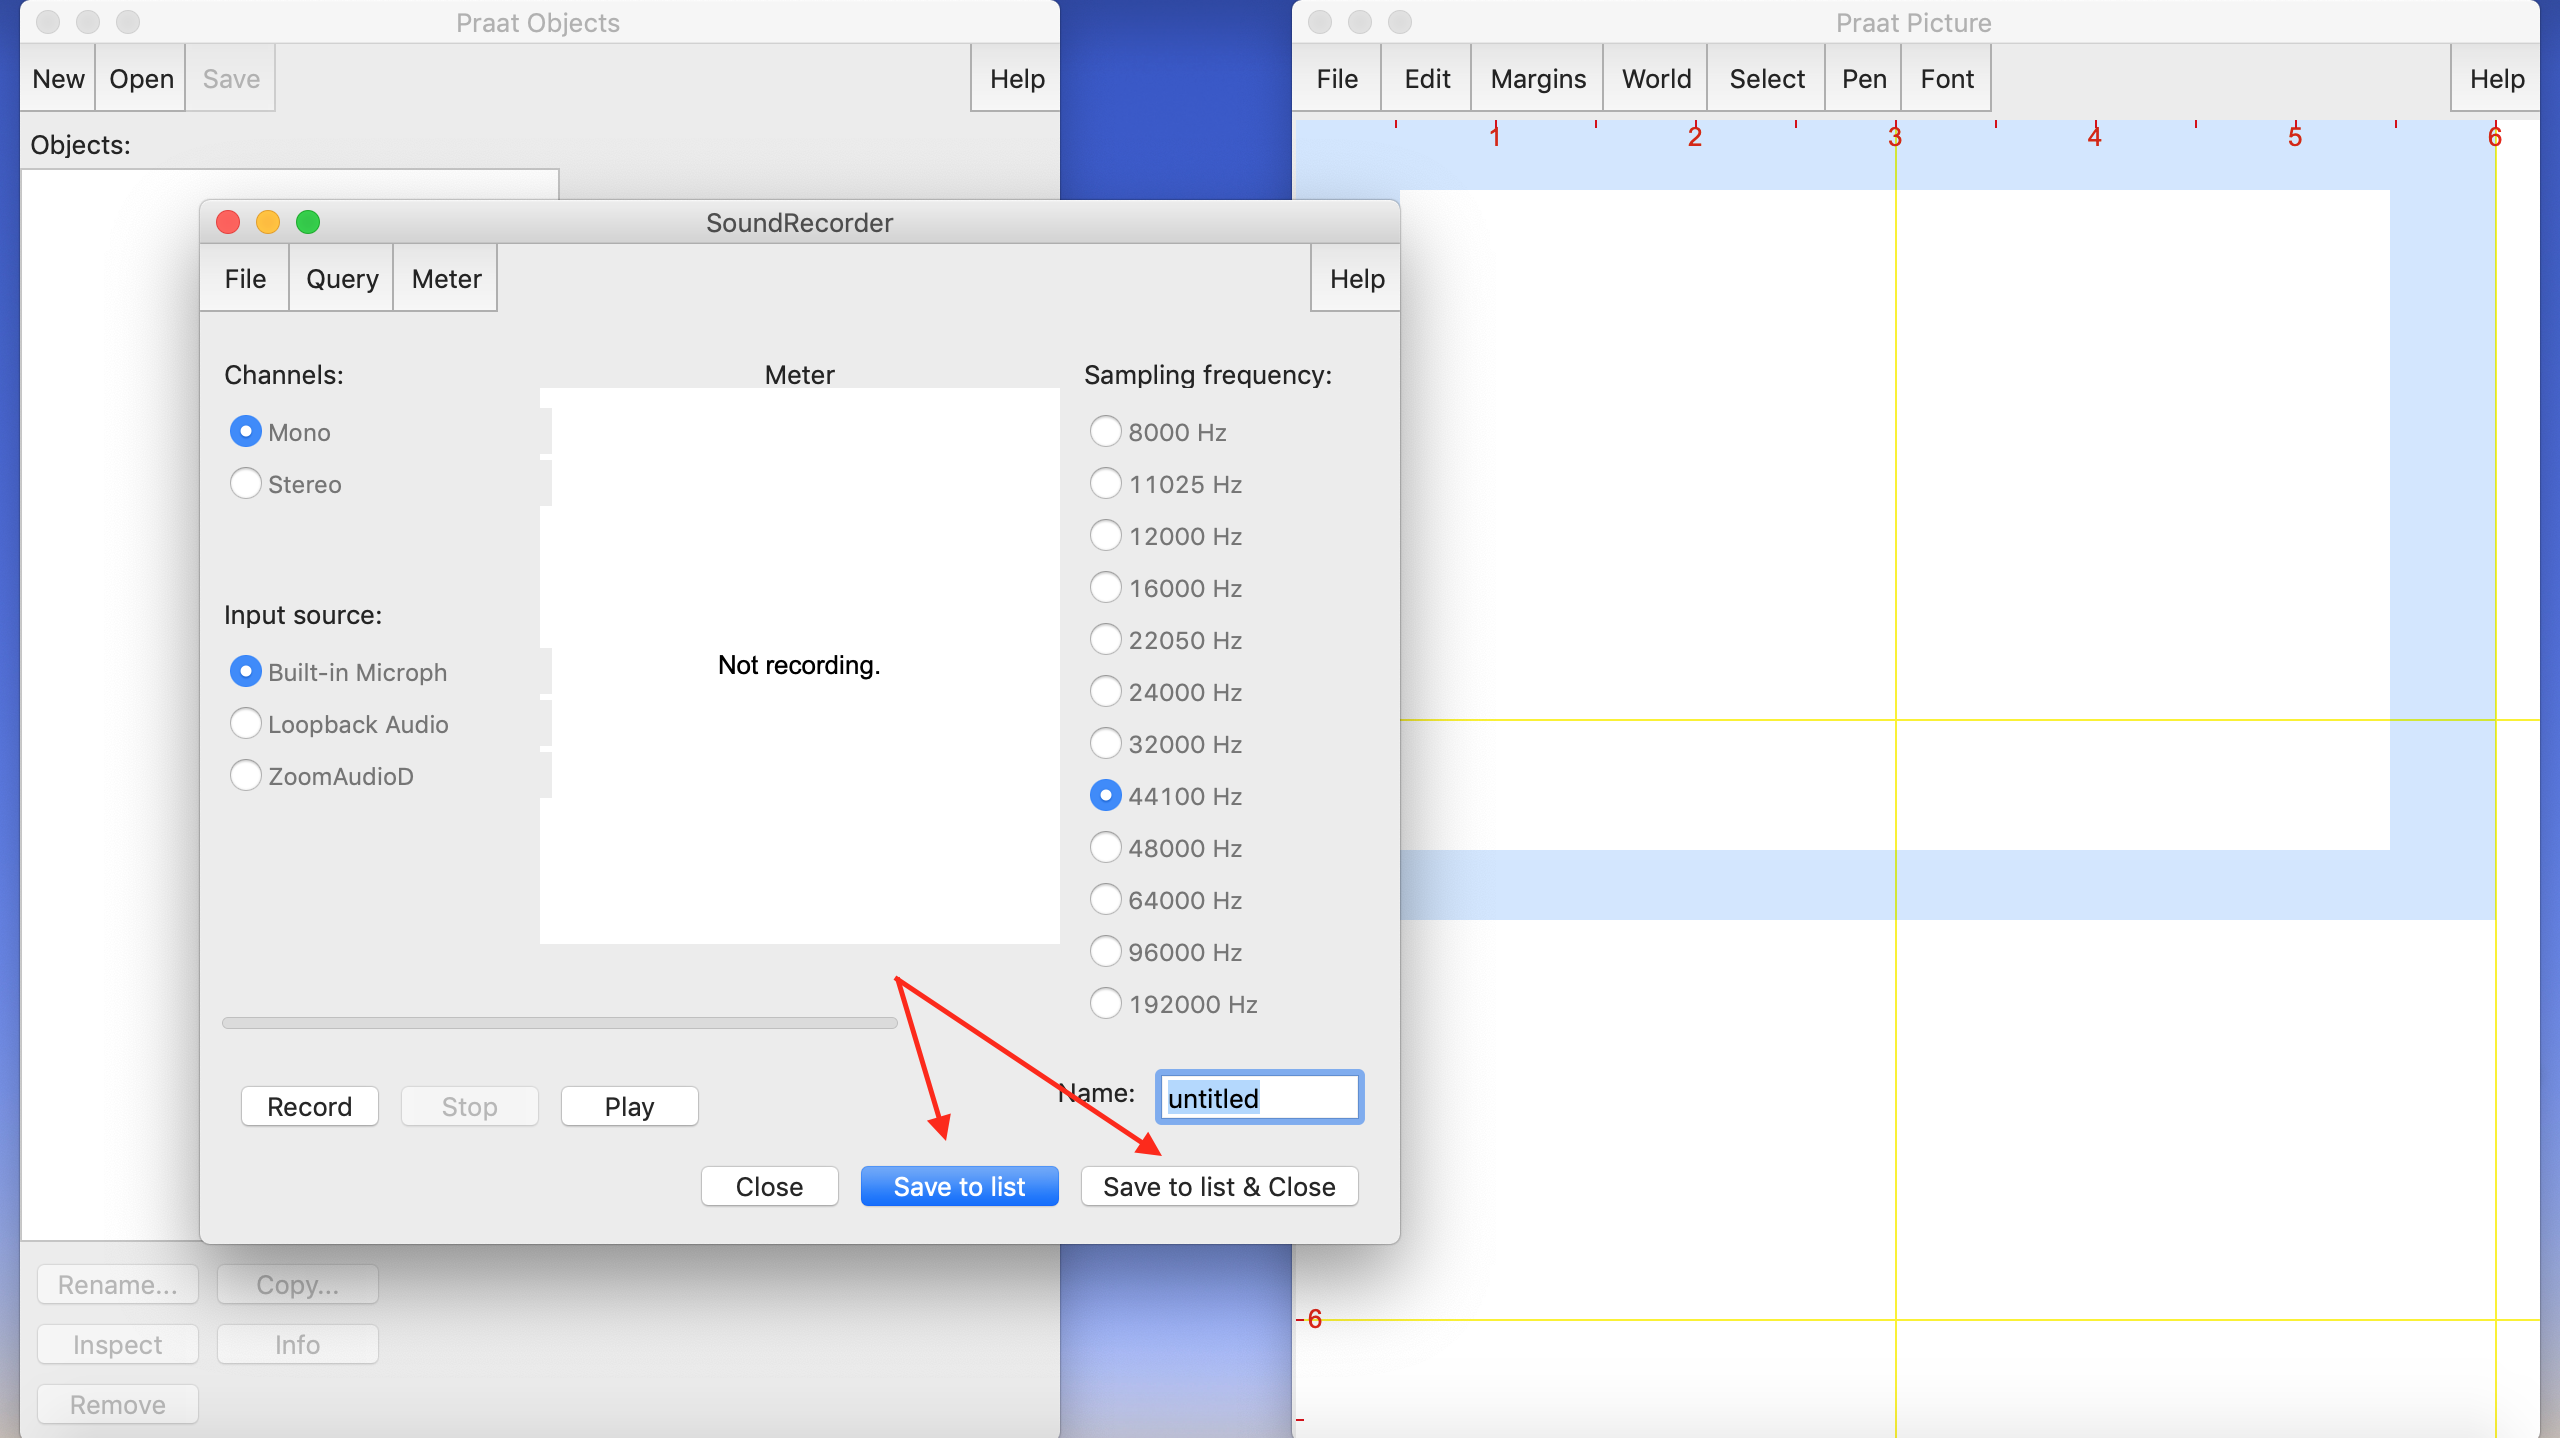
Don’t forget to save the file before you close the window! PRAAT does not automatically save anything. You can either “Save to list” or “Save to list & Close”. This step will only save your file in the left panel, but you still need to save it in your computer (see step 5).
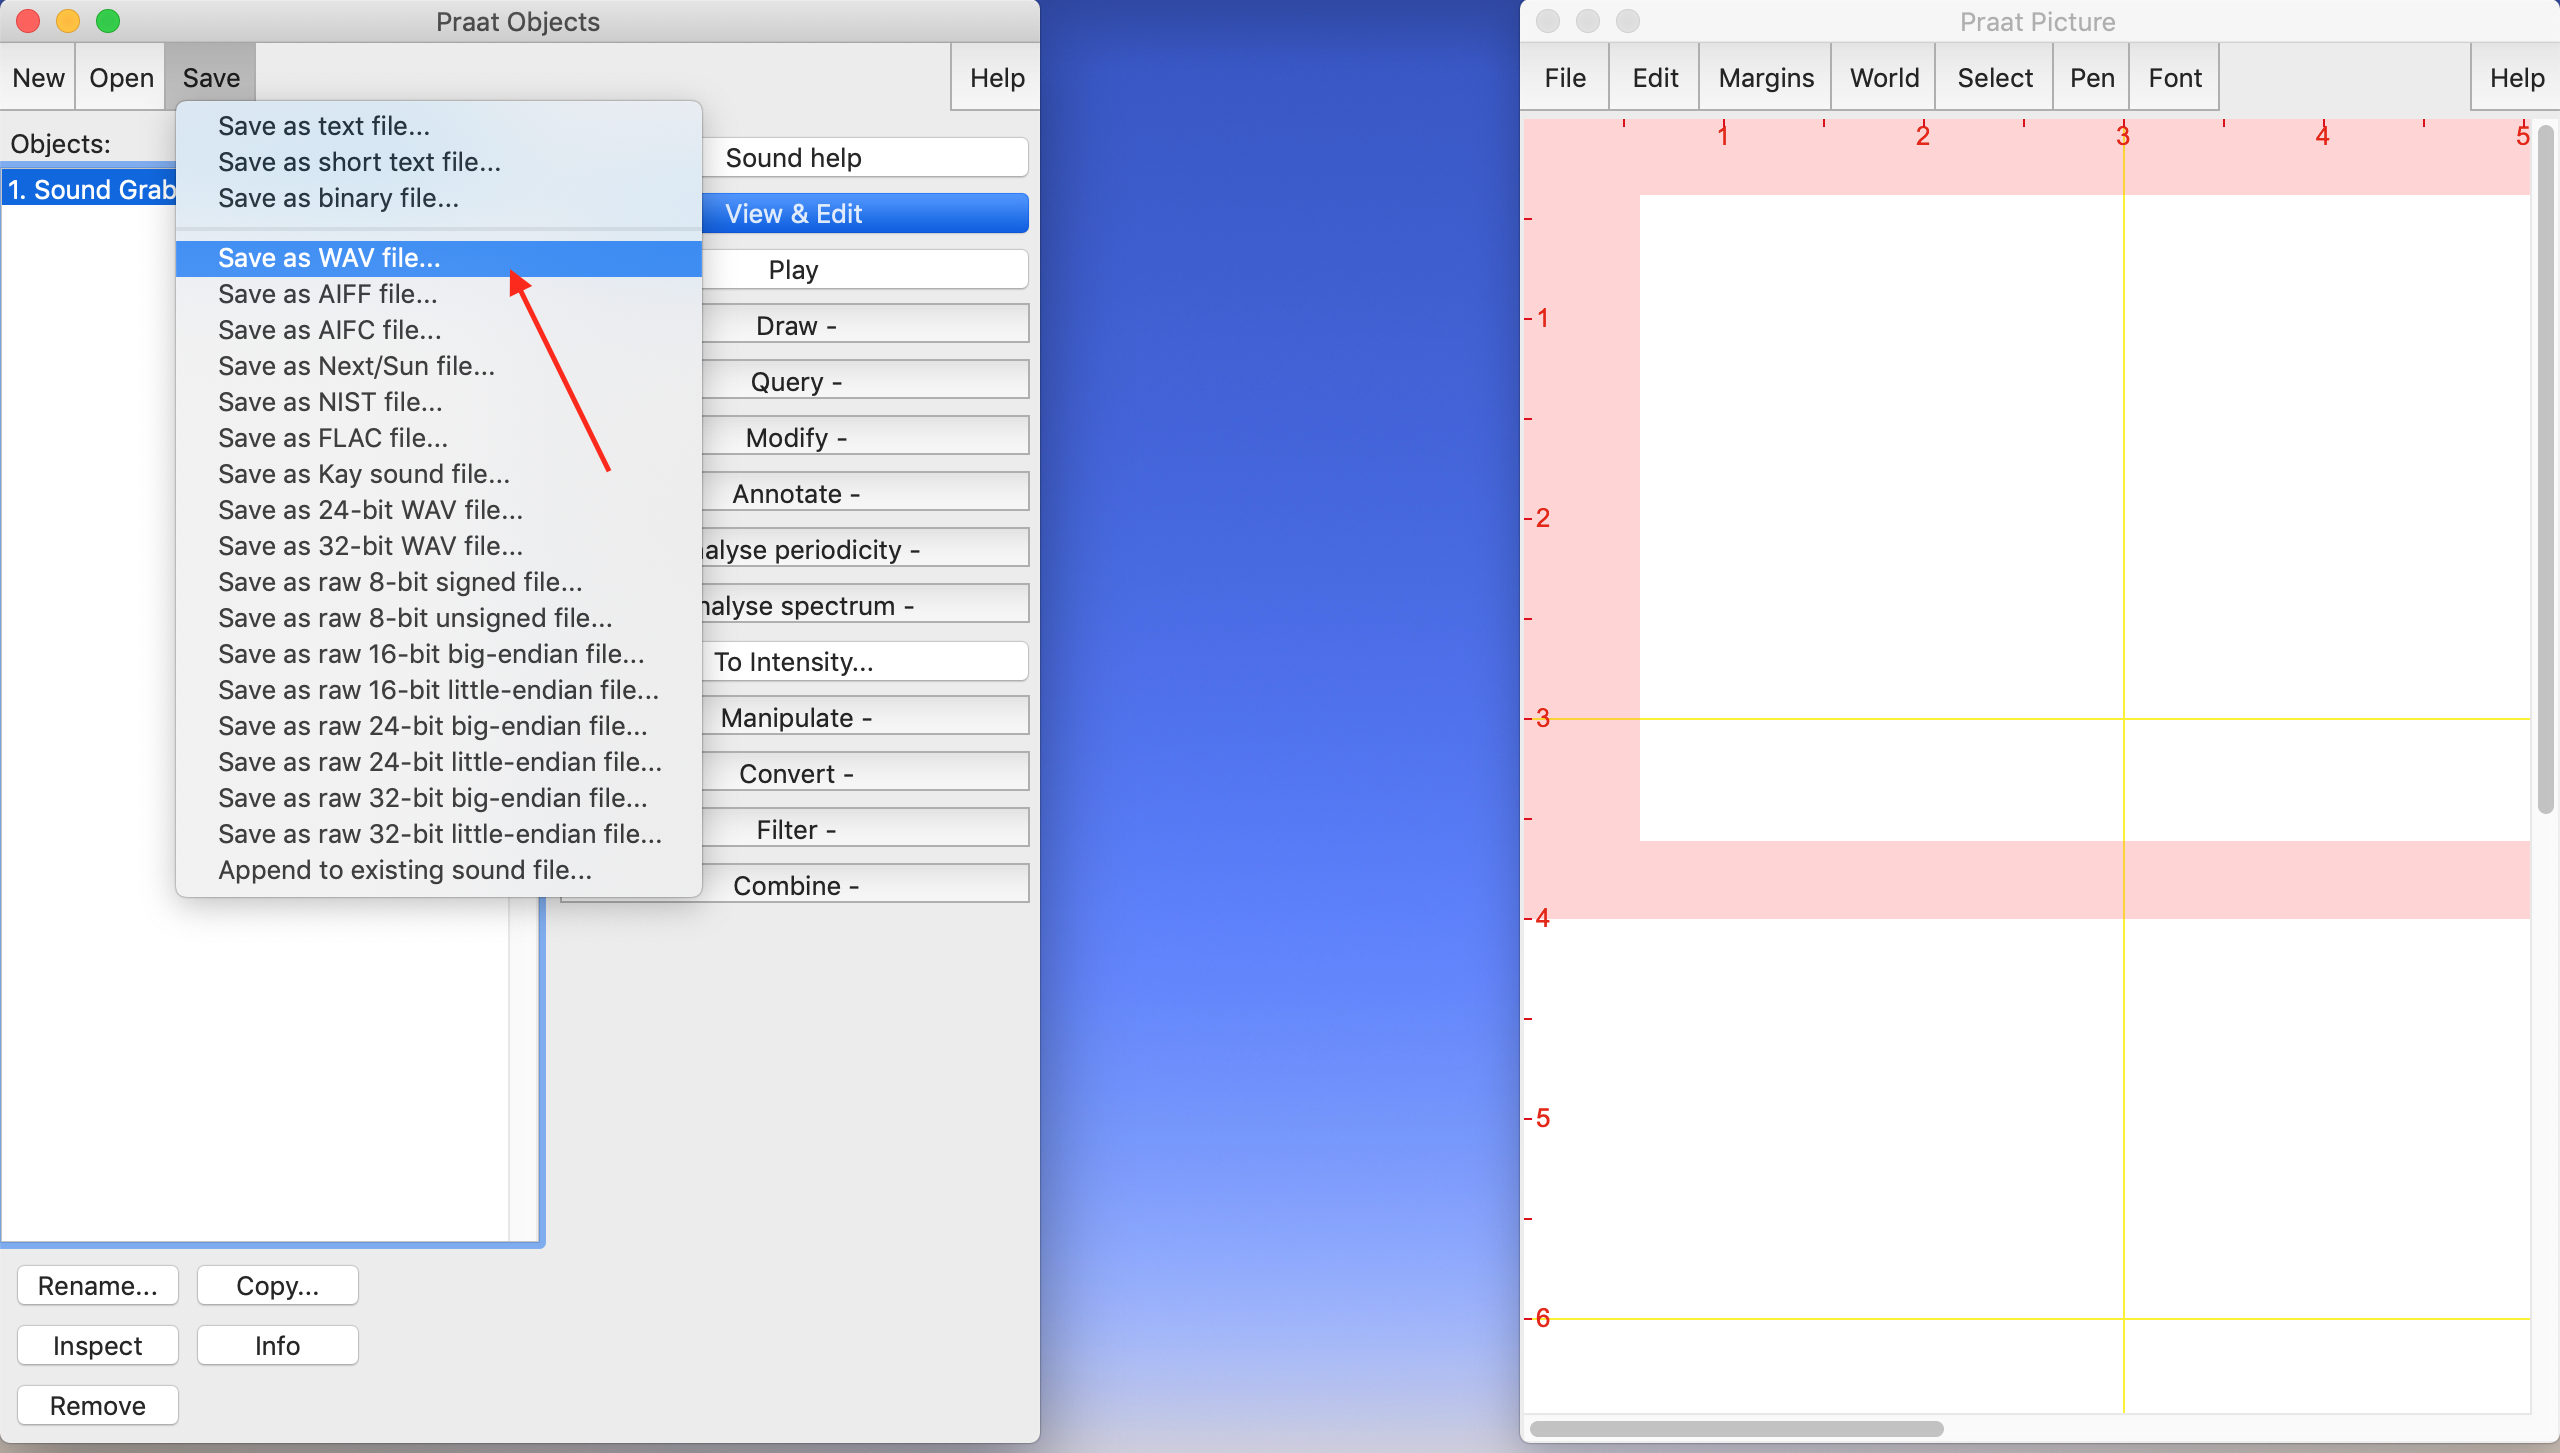
Finally, to save the file in your computer, click the file’s name on the left panel, and then click “Save” > “Save as WAV file”.
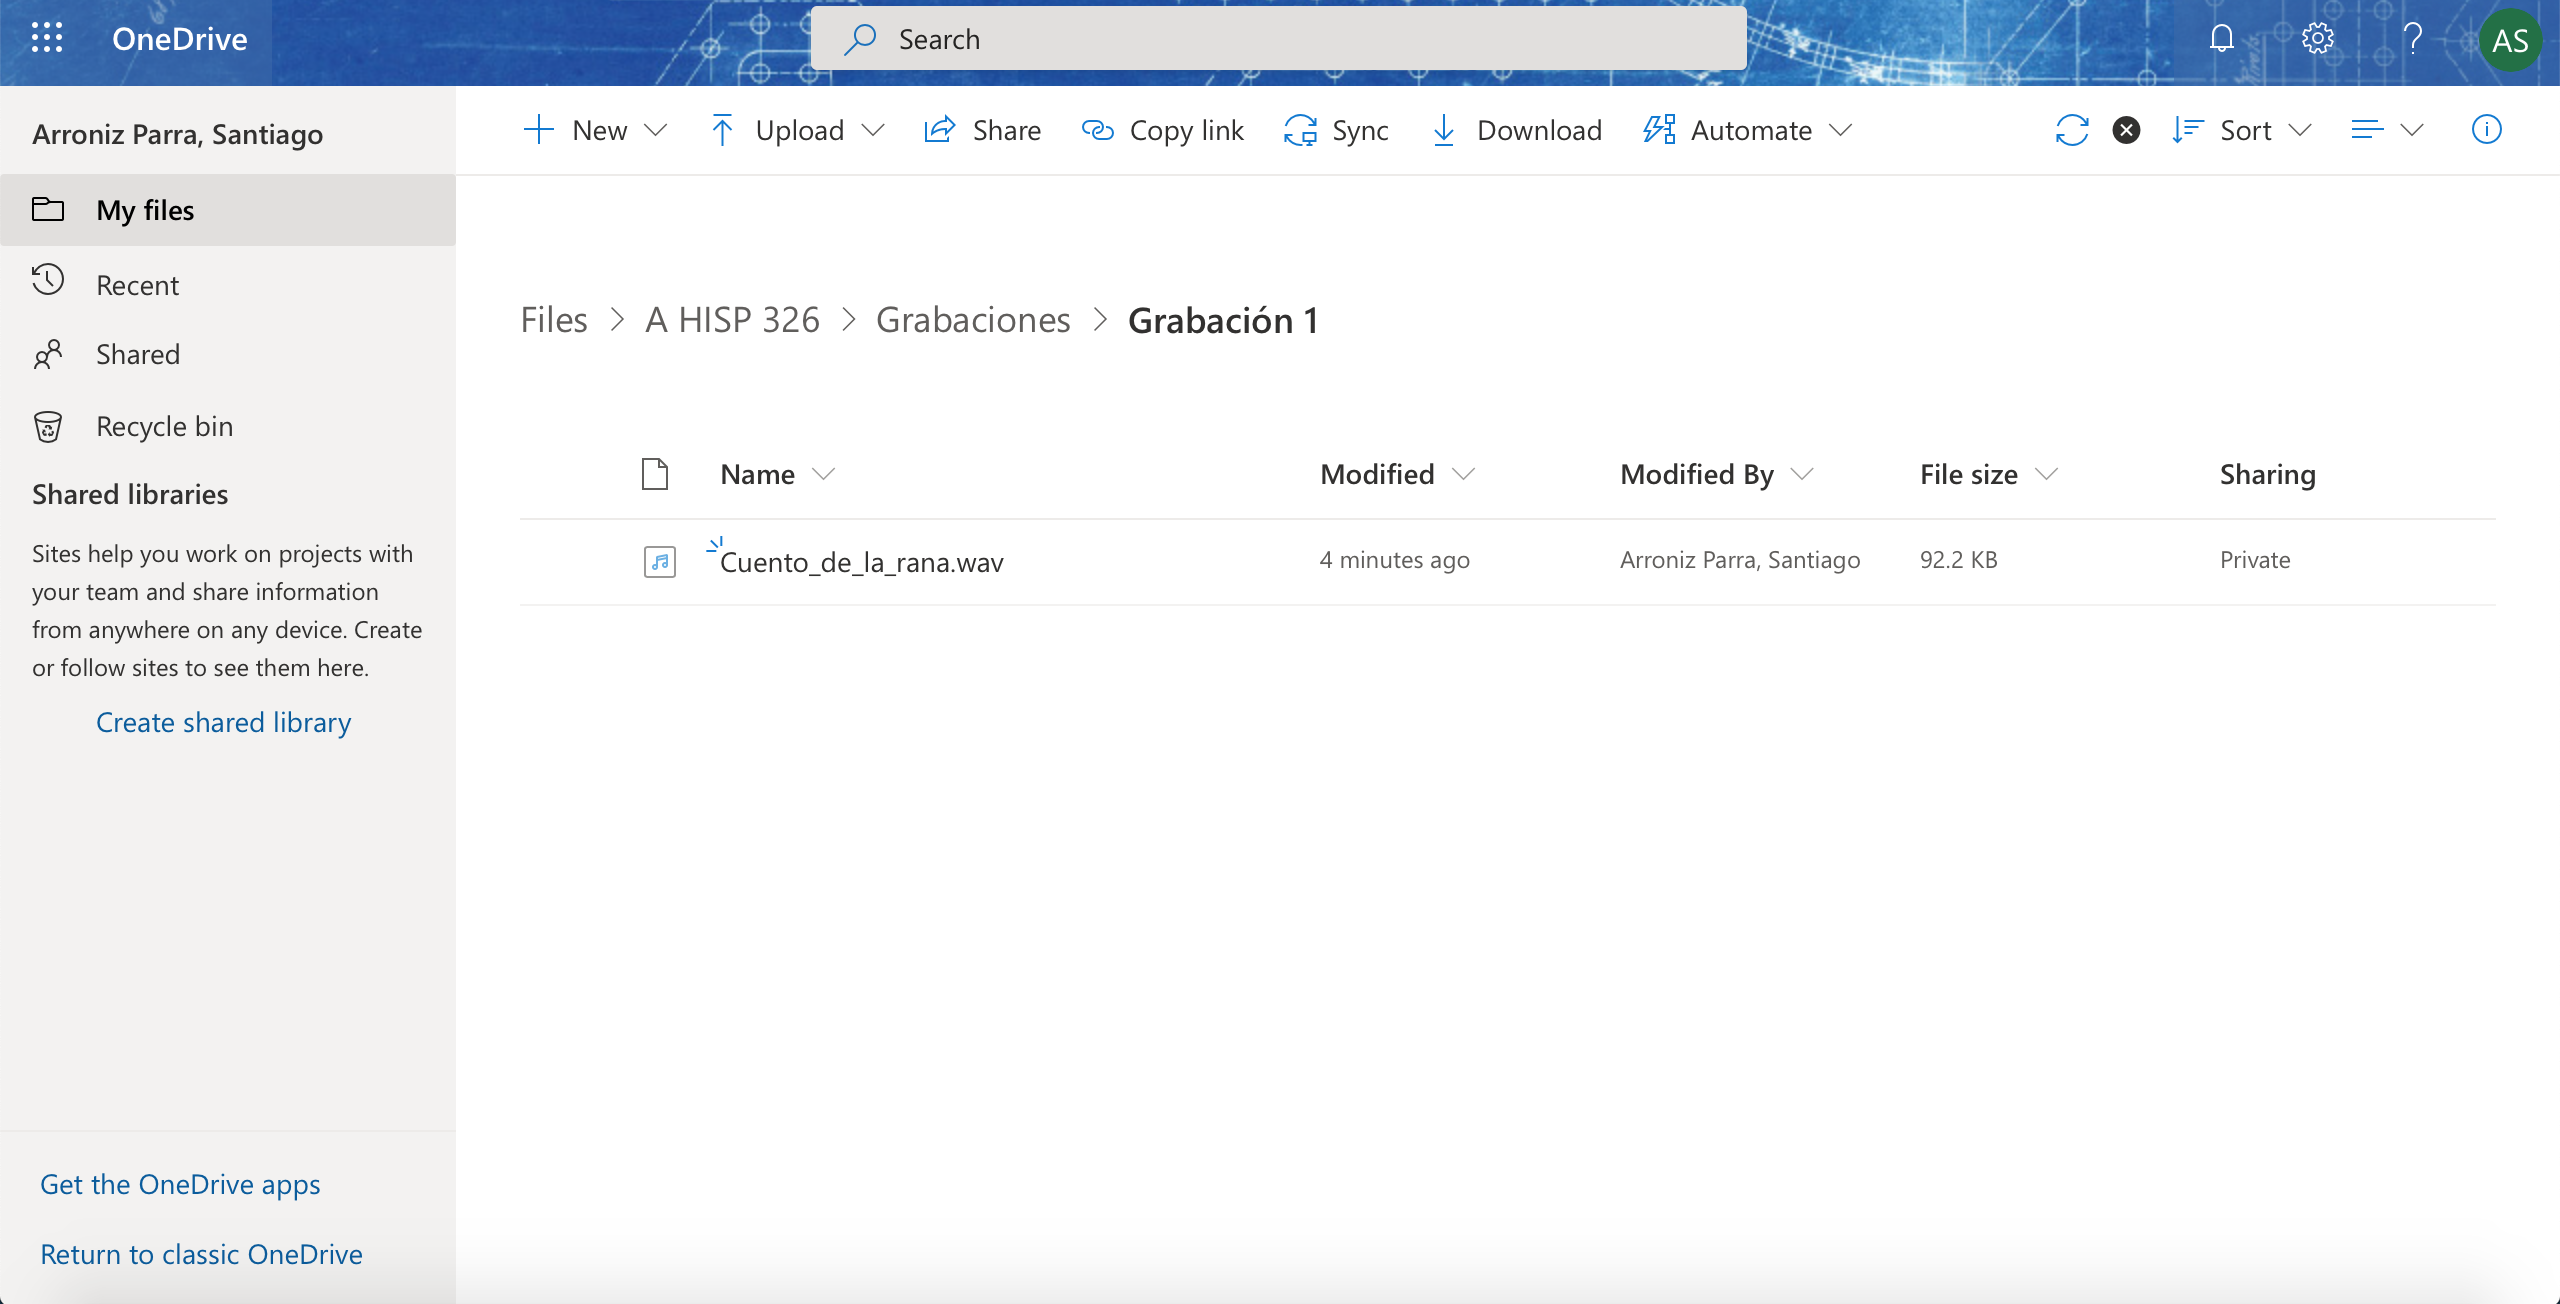
Save it, and upload it to OneDrive. You should create one main folder named “Grabaciones”, and then 3 subfolders, one for each “Grabación”. Create the first folder for “Grabación 1” and upload you audio files there. Copy, paste and submit the link to your main folder “Grabaciones” to the Canvas assignment “Grabación 1”. Don’t forget to give me access to your folder in OneDrive!
Creating a new TextGrid
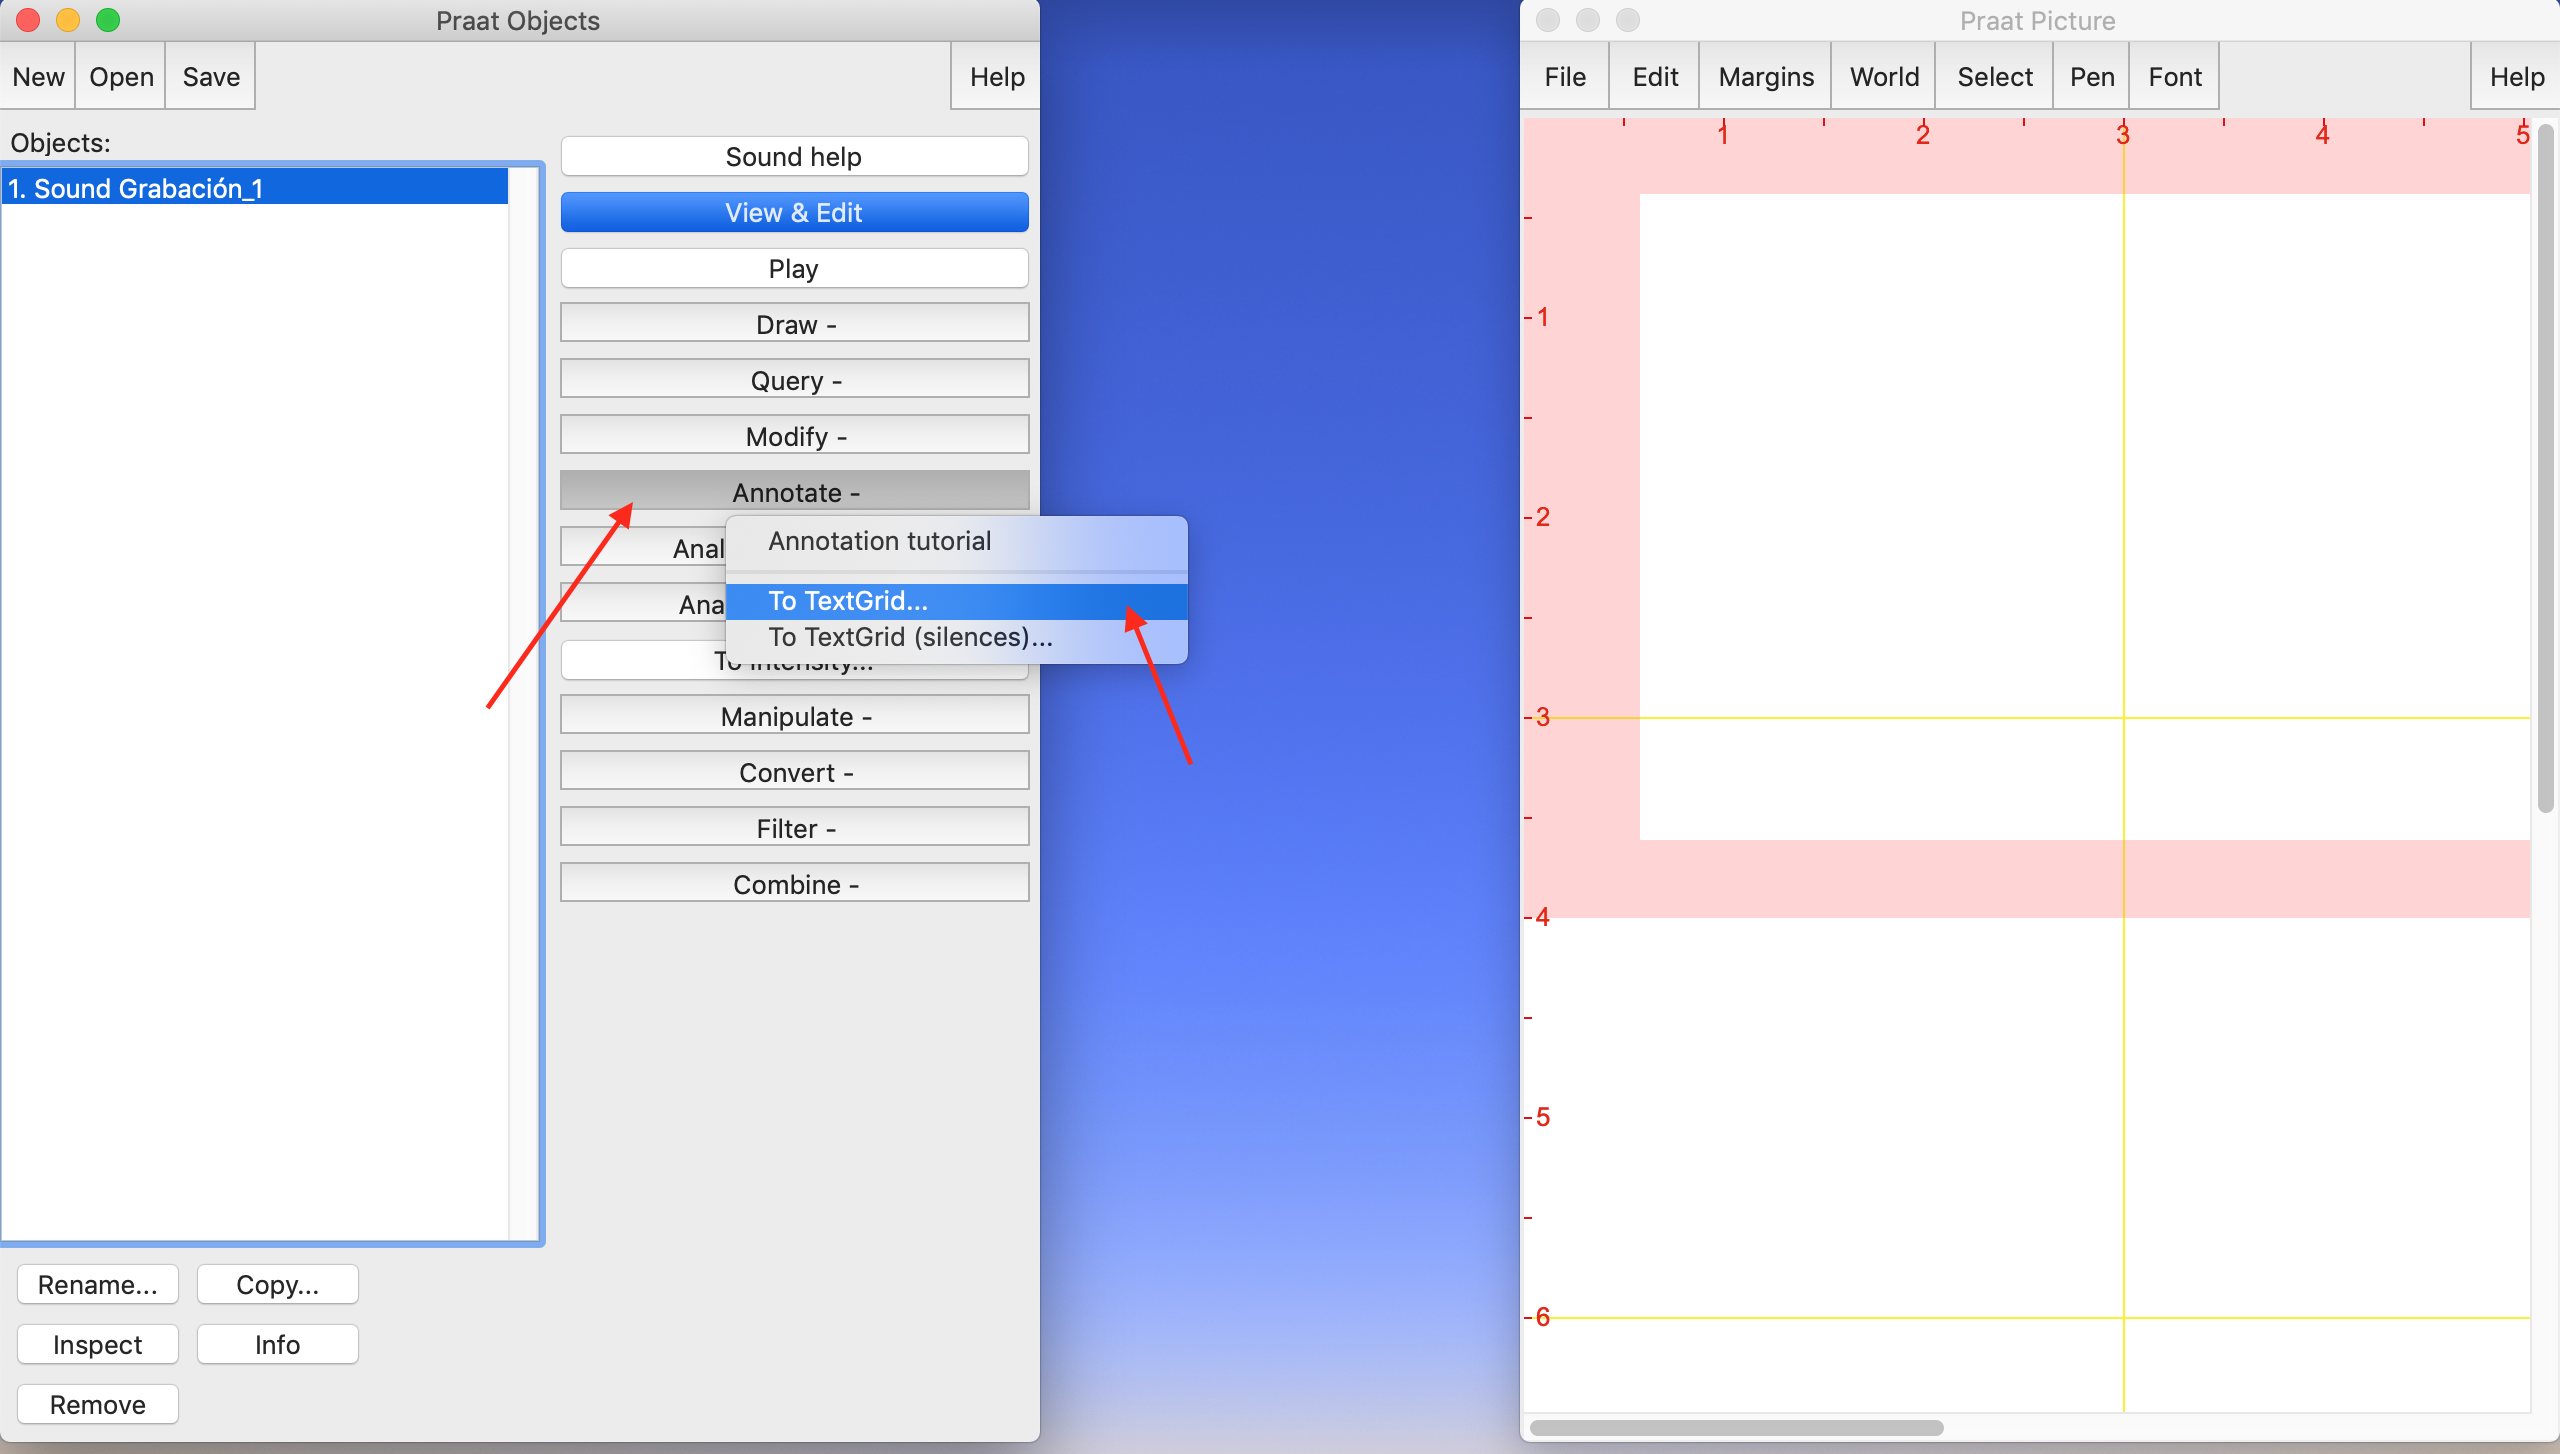
In PRAAT, in the left panel, select the audio for which you want to create a TextGrid. Then, click on “Annotate” > “To TextGrid…”
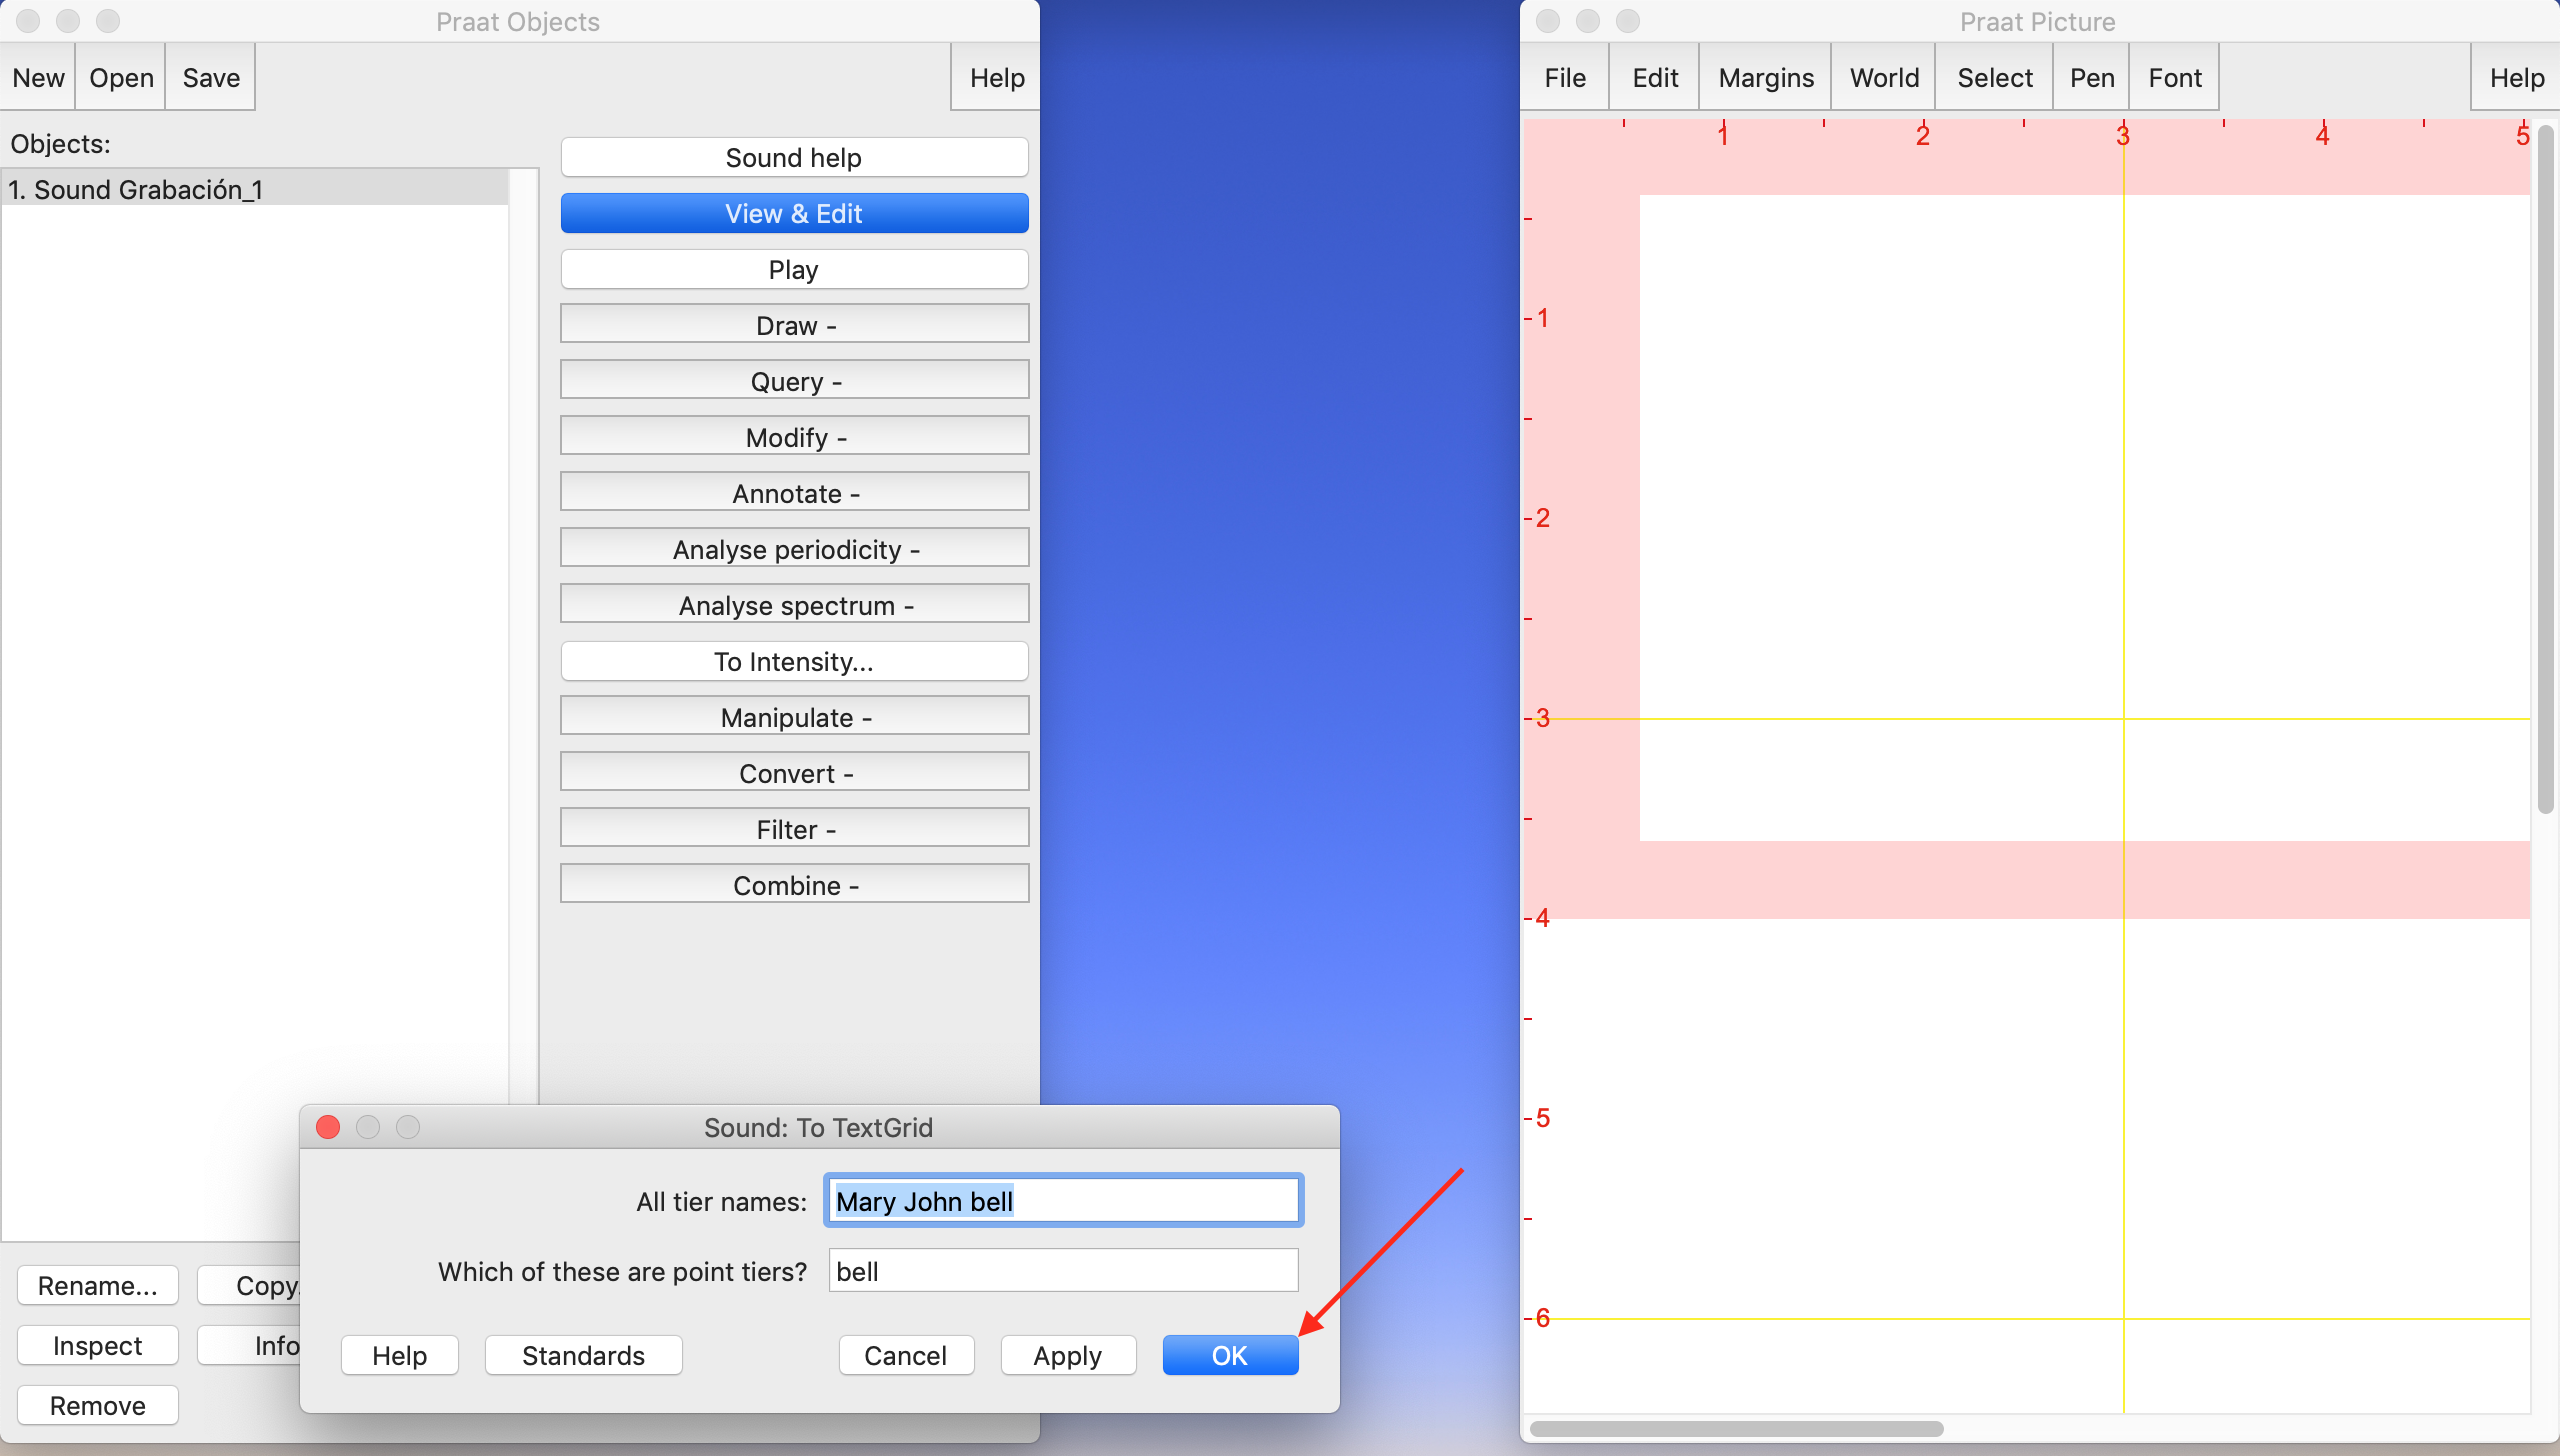
Create the TextGrid with the default settings.
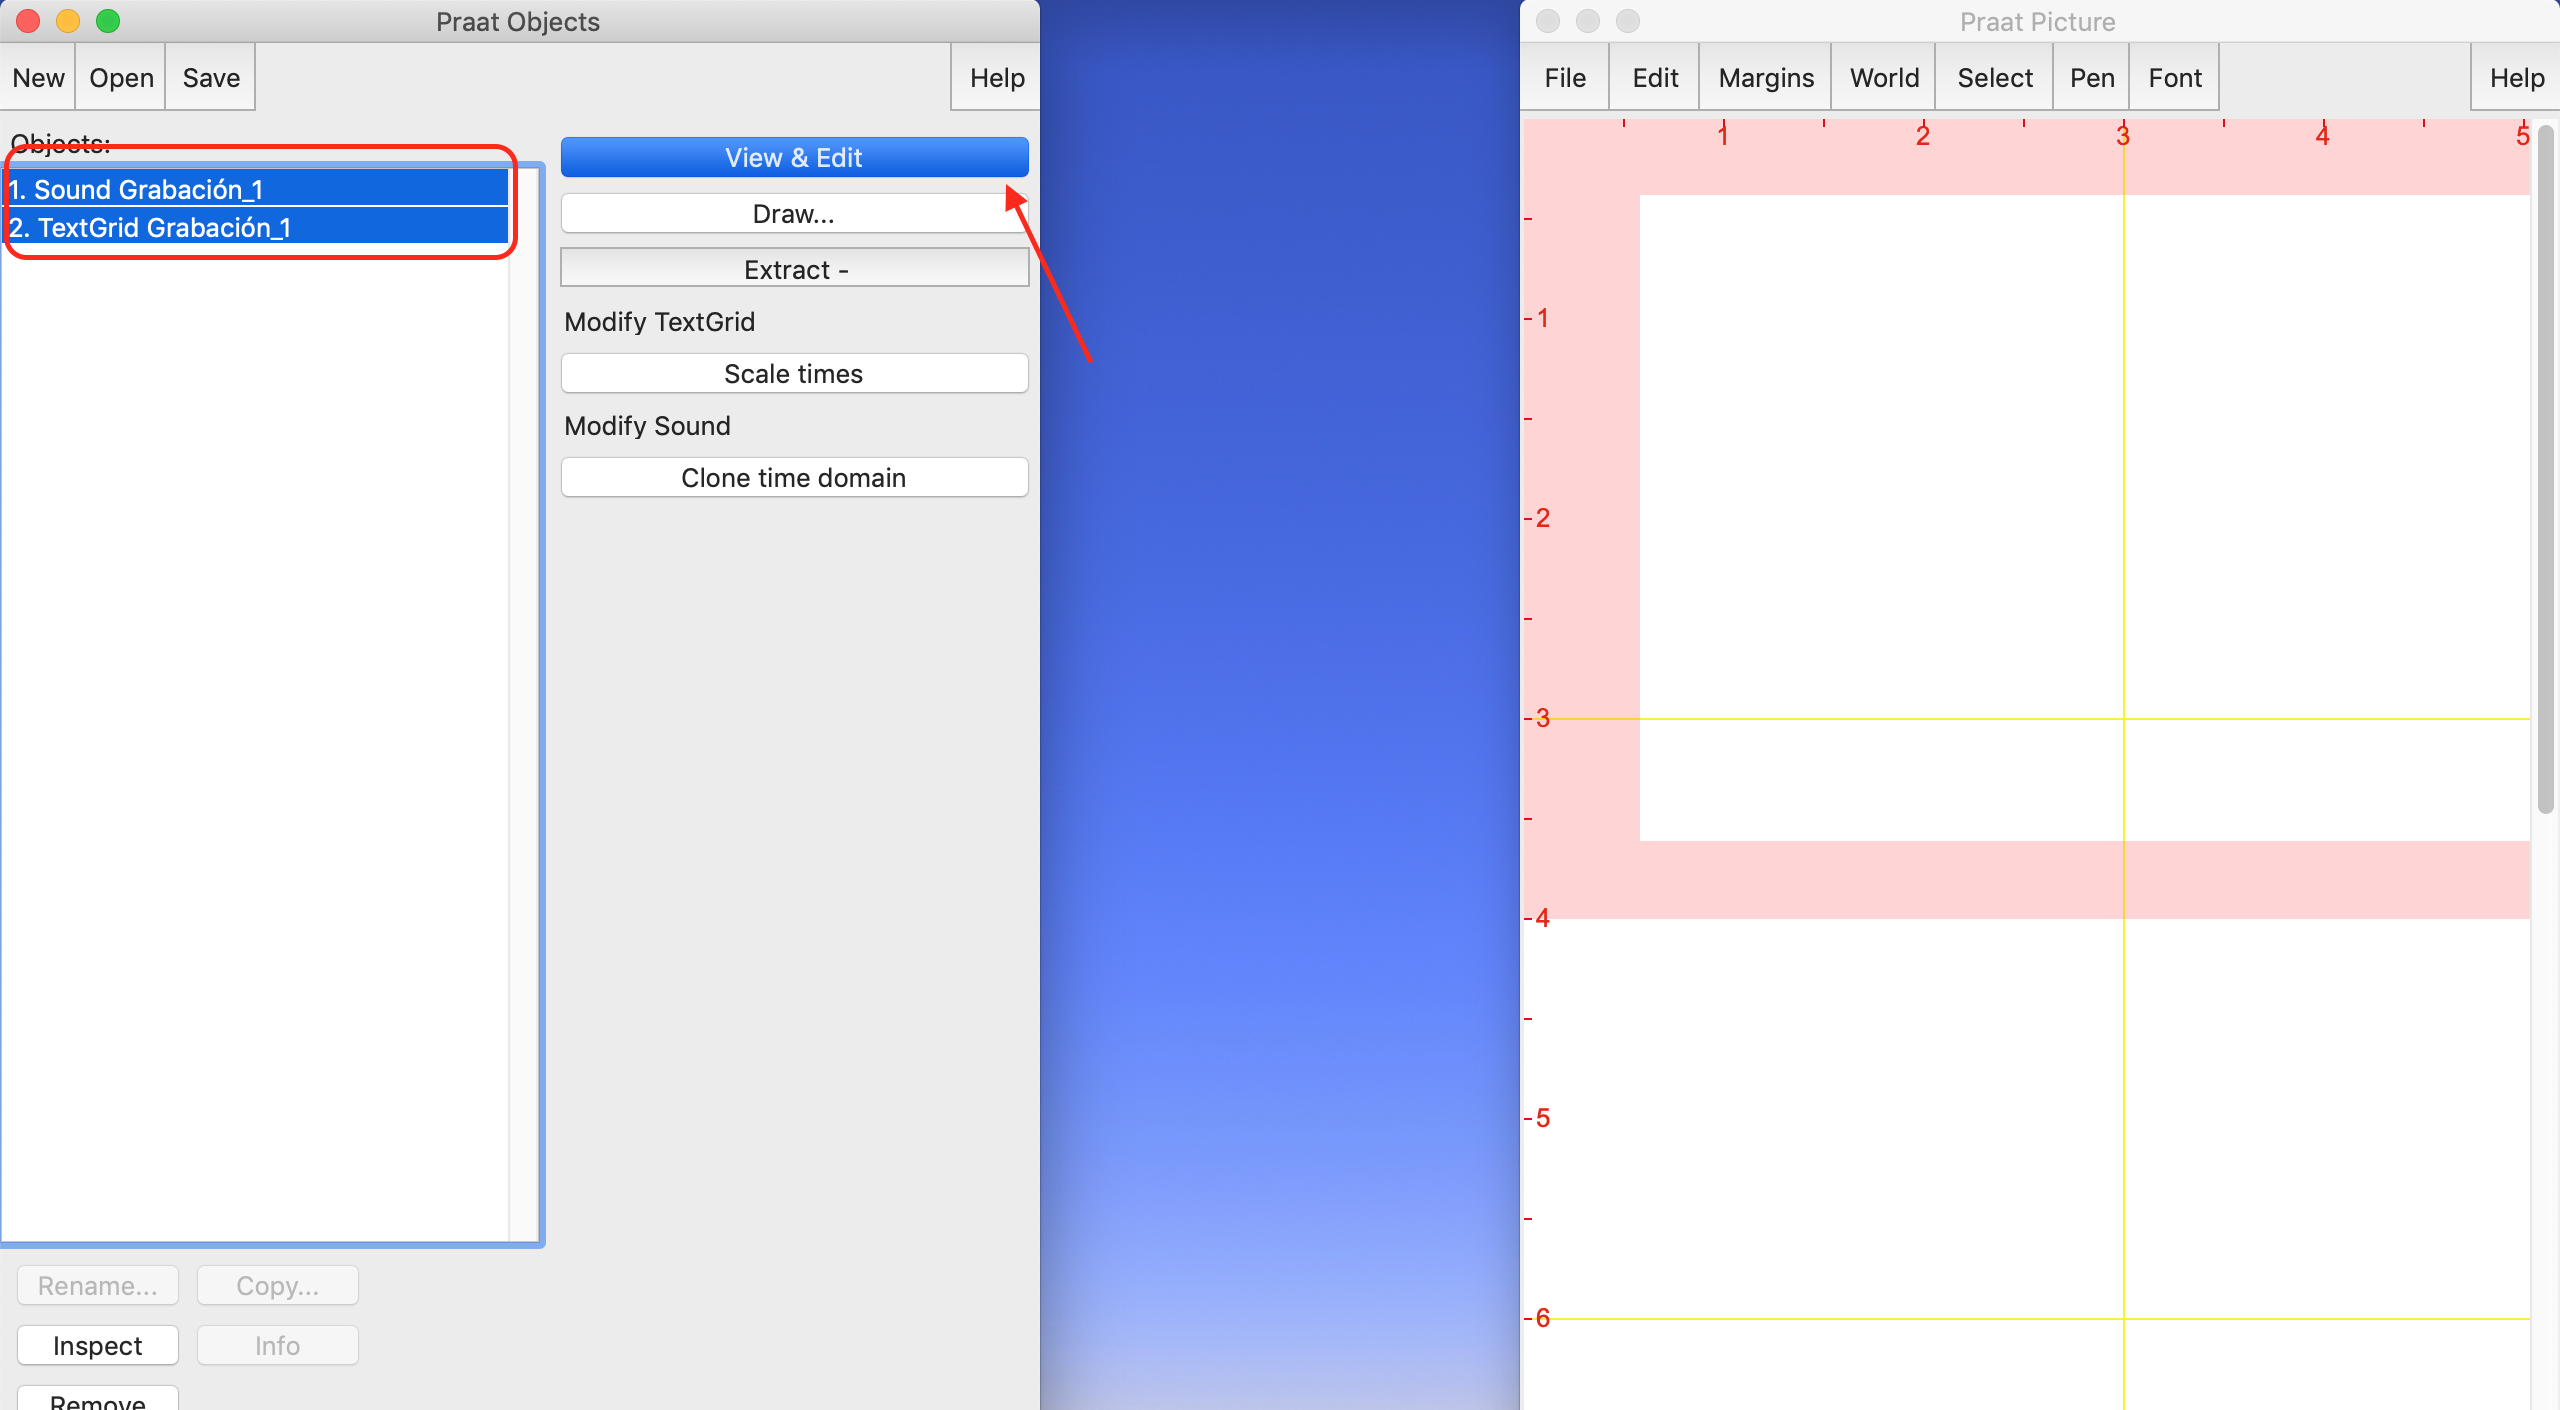
To see and edit the recording with the TextGrid, select both files in the left panel, and click on “View & Edit”. You can then type into the yellow boxes.
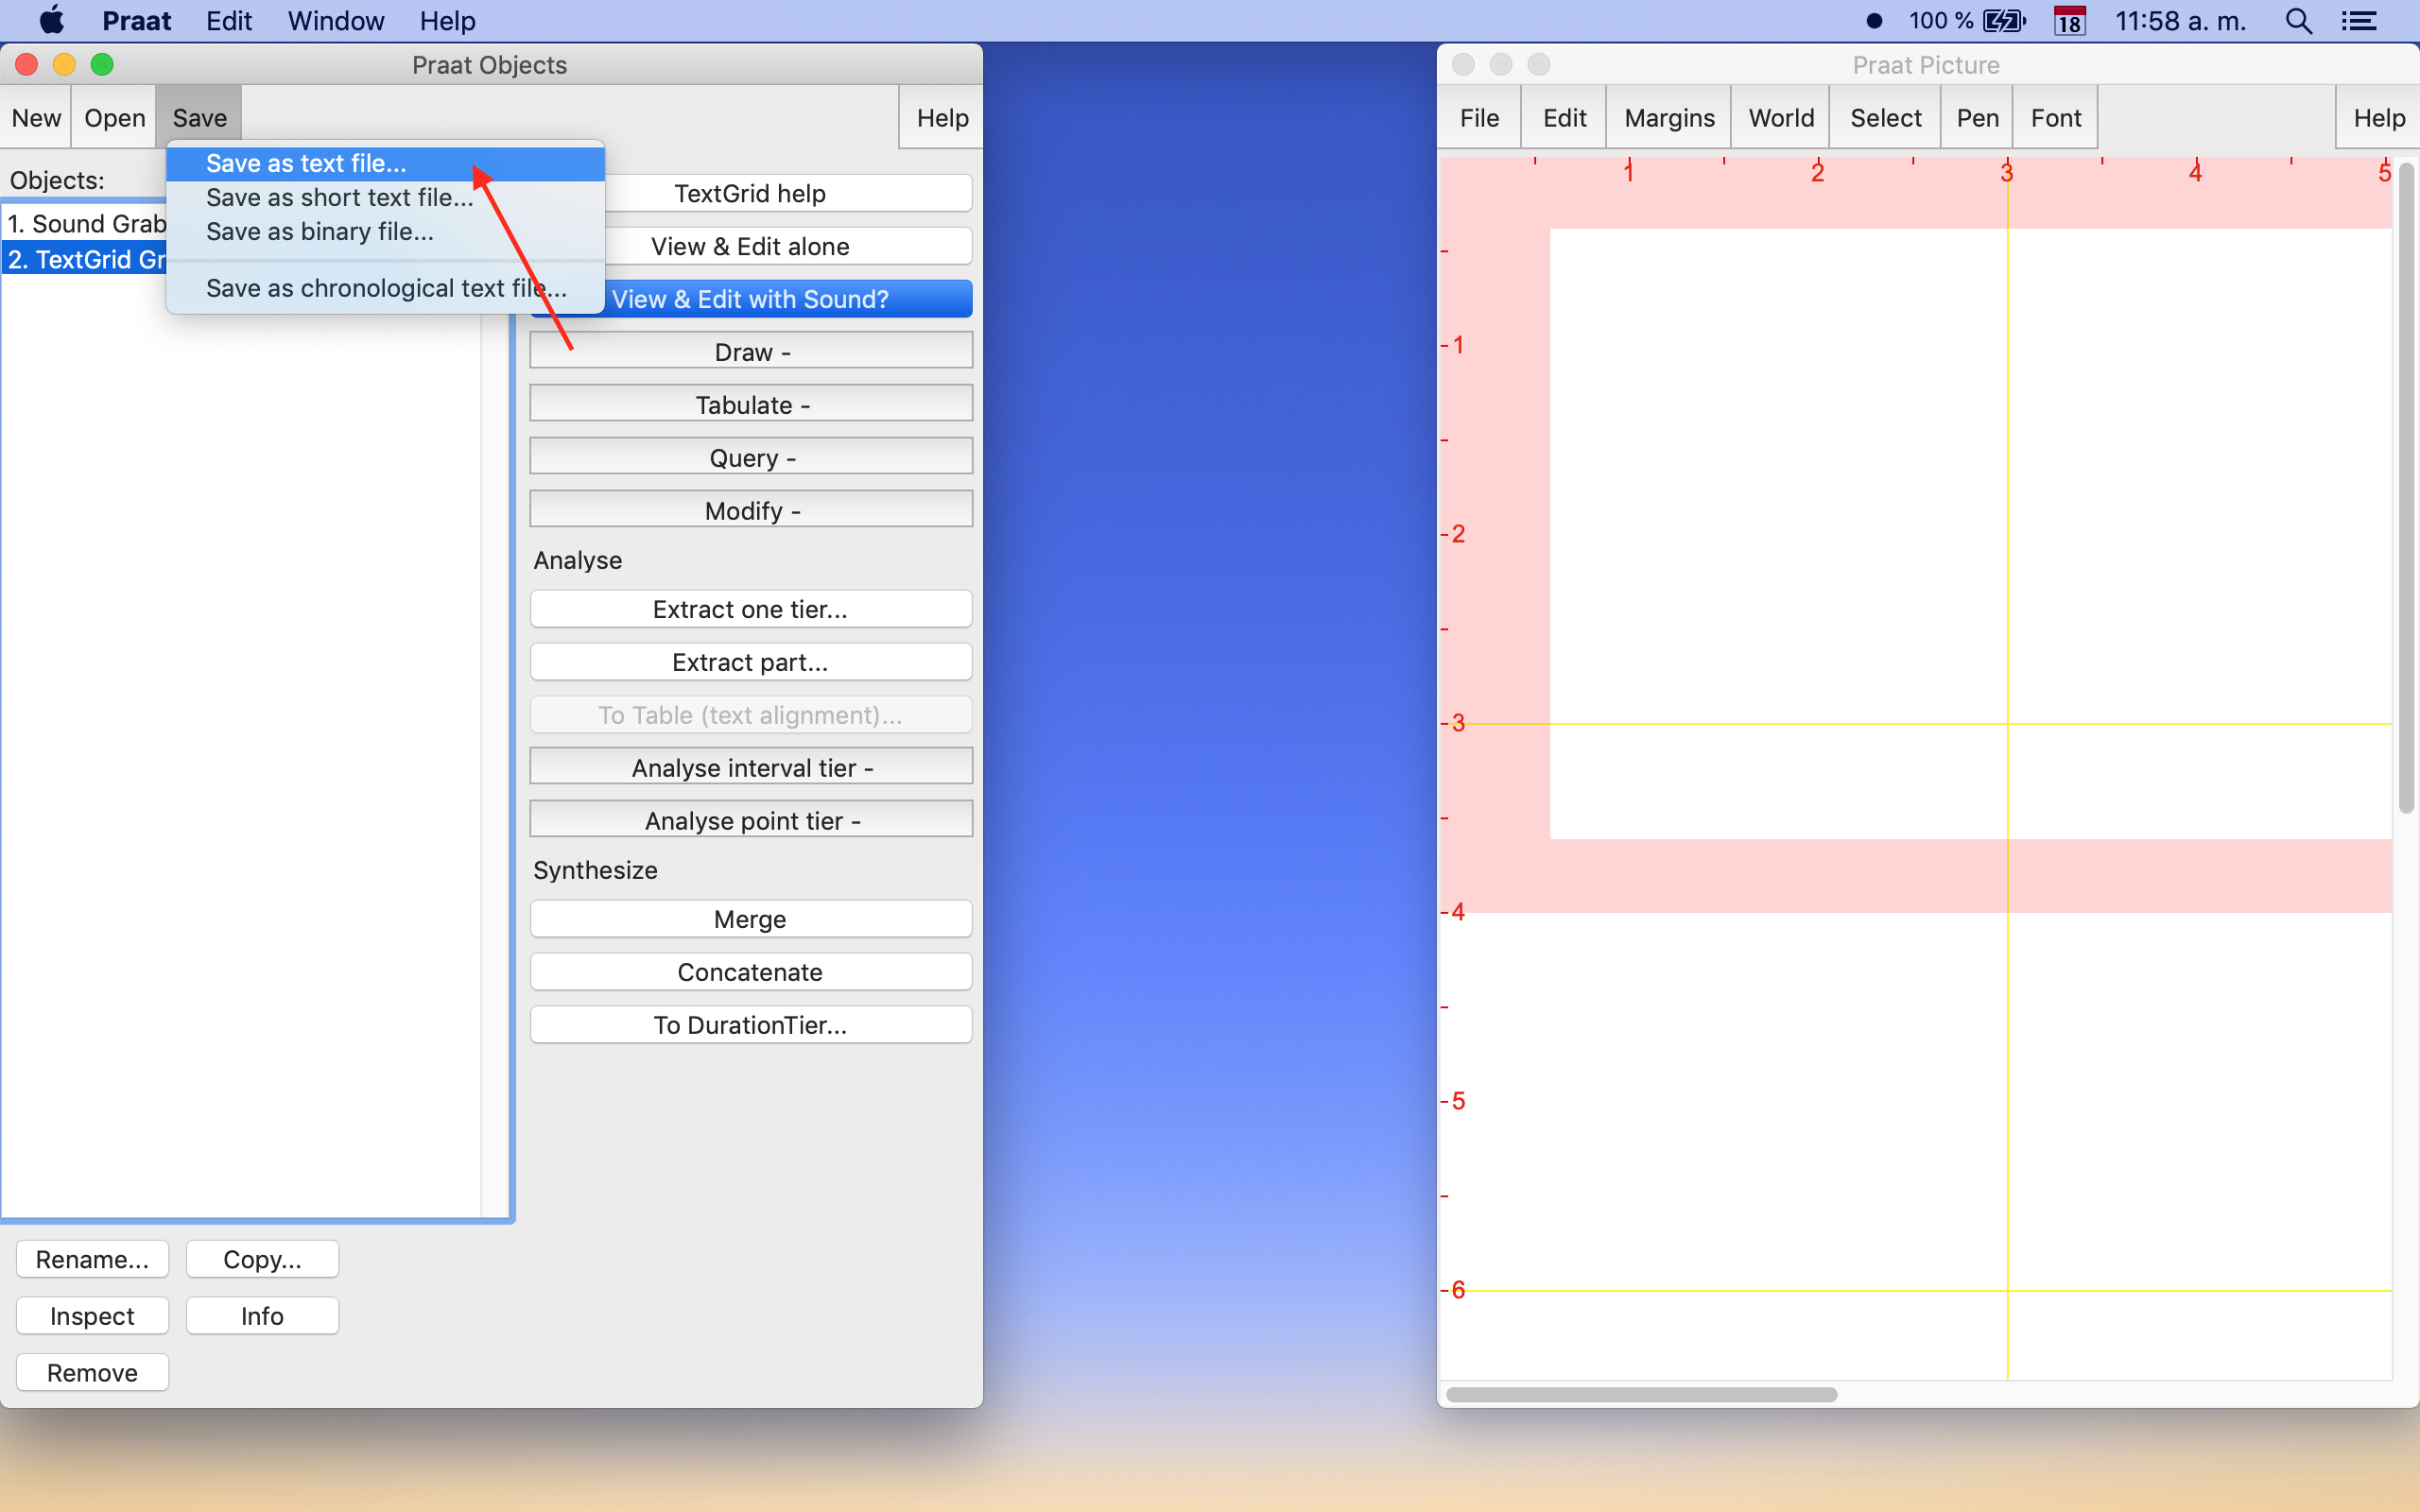
Don’t forget to save your TextGrid! Once you are done editing your TextGrid, you can close the “View & Edit” window, and then, in the left panel, select the TextGrid file and click on “Save” > “Save as text file…”